A Beginner's Guide To timeTracko
If you are wondering how to set up timeTracko at your office and improve your company's productivity, then this guide is for you.
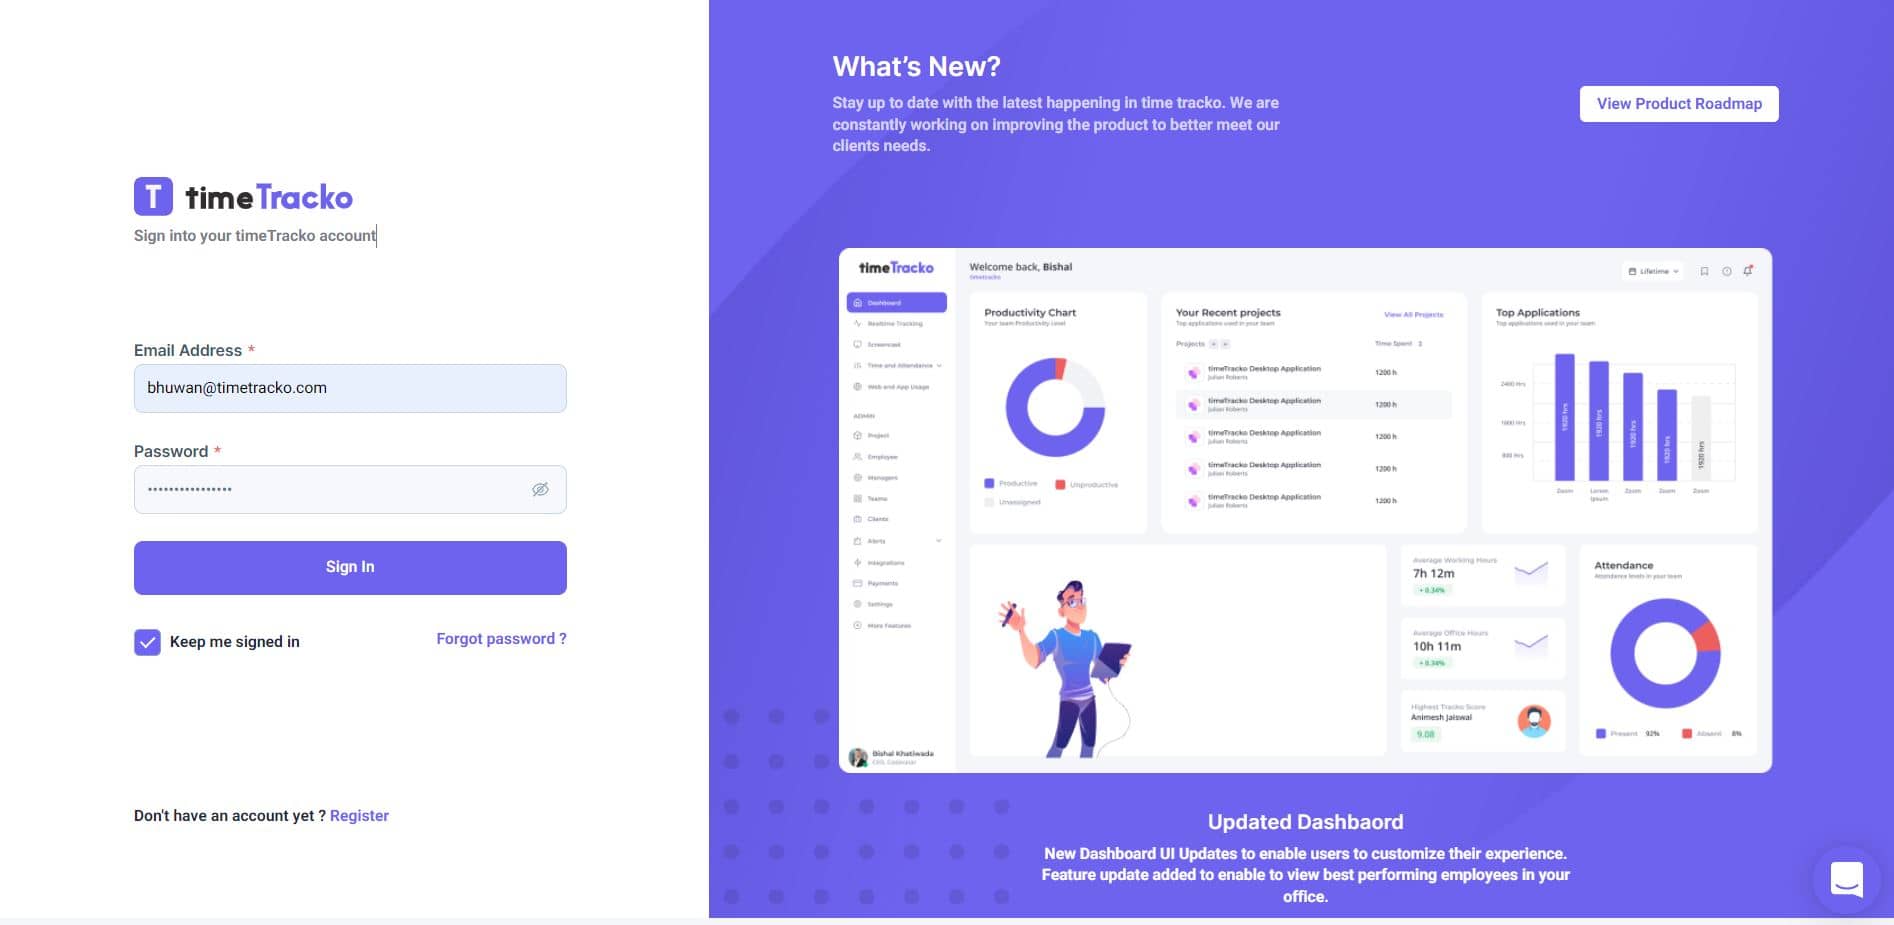
Sign In Process
Log in to your timeTracko account using the credentials that you used when signing up for the account.
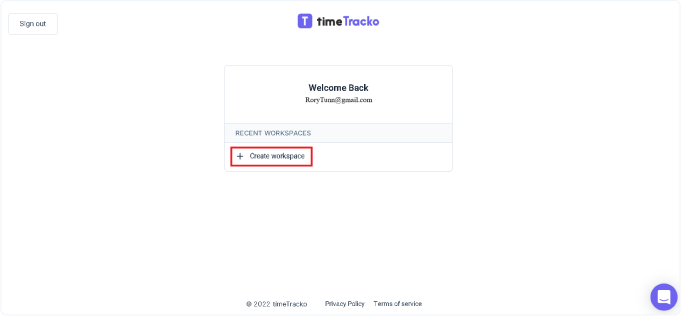
Workspace
Once you log in to your timeTracko account, you will be redirected to the page to Create Workspace.
-
To create the workspace, just tap on Create Workspace button.
-
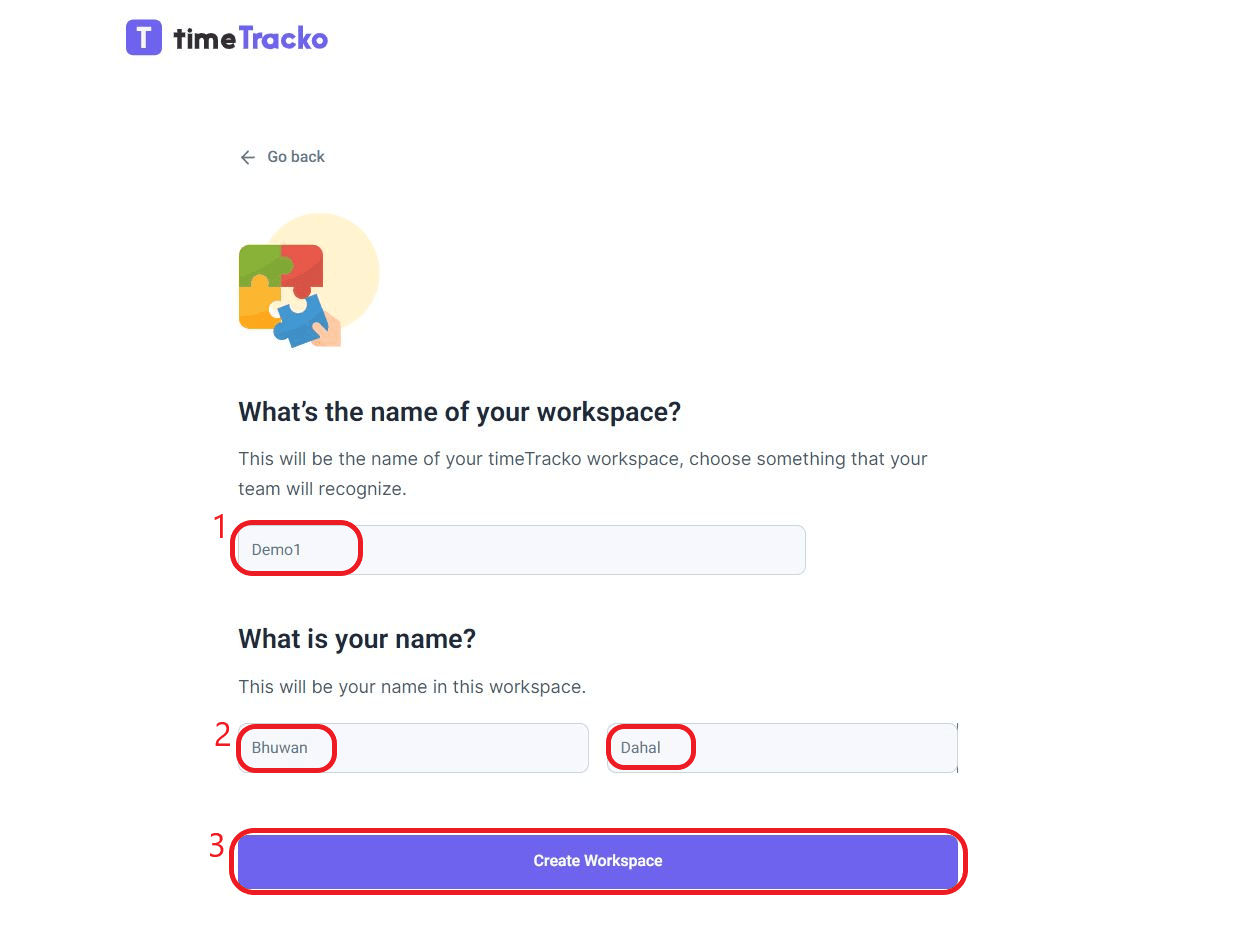
Now enter the name of your WorkSpace and your name and finally tap on Create Workspace.
-
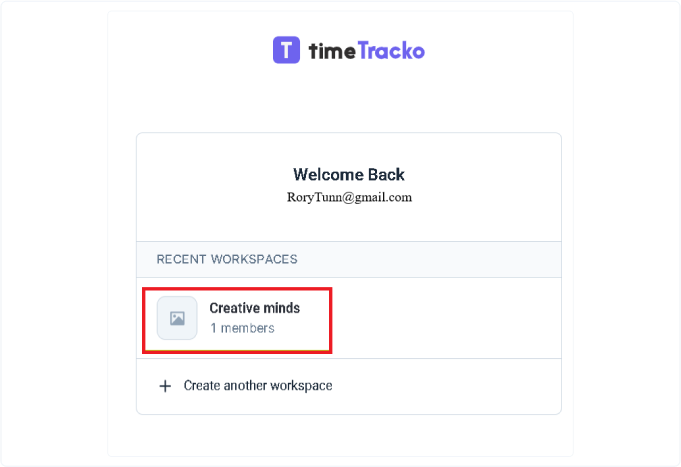
Finally, your workspace is created. Tap on the workspace to enter into the Dashboard.
-
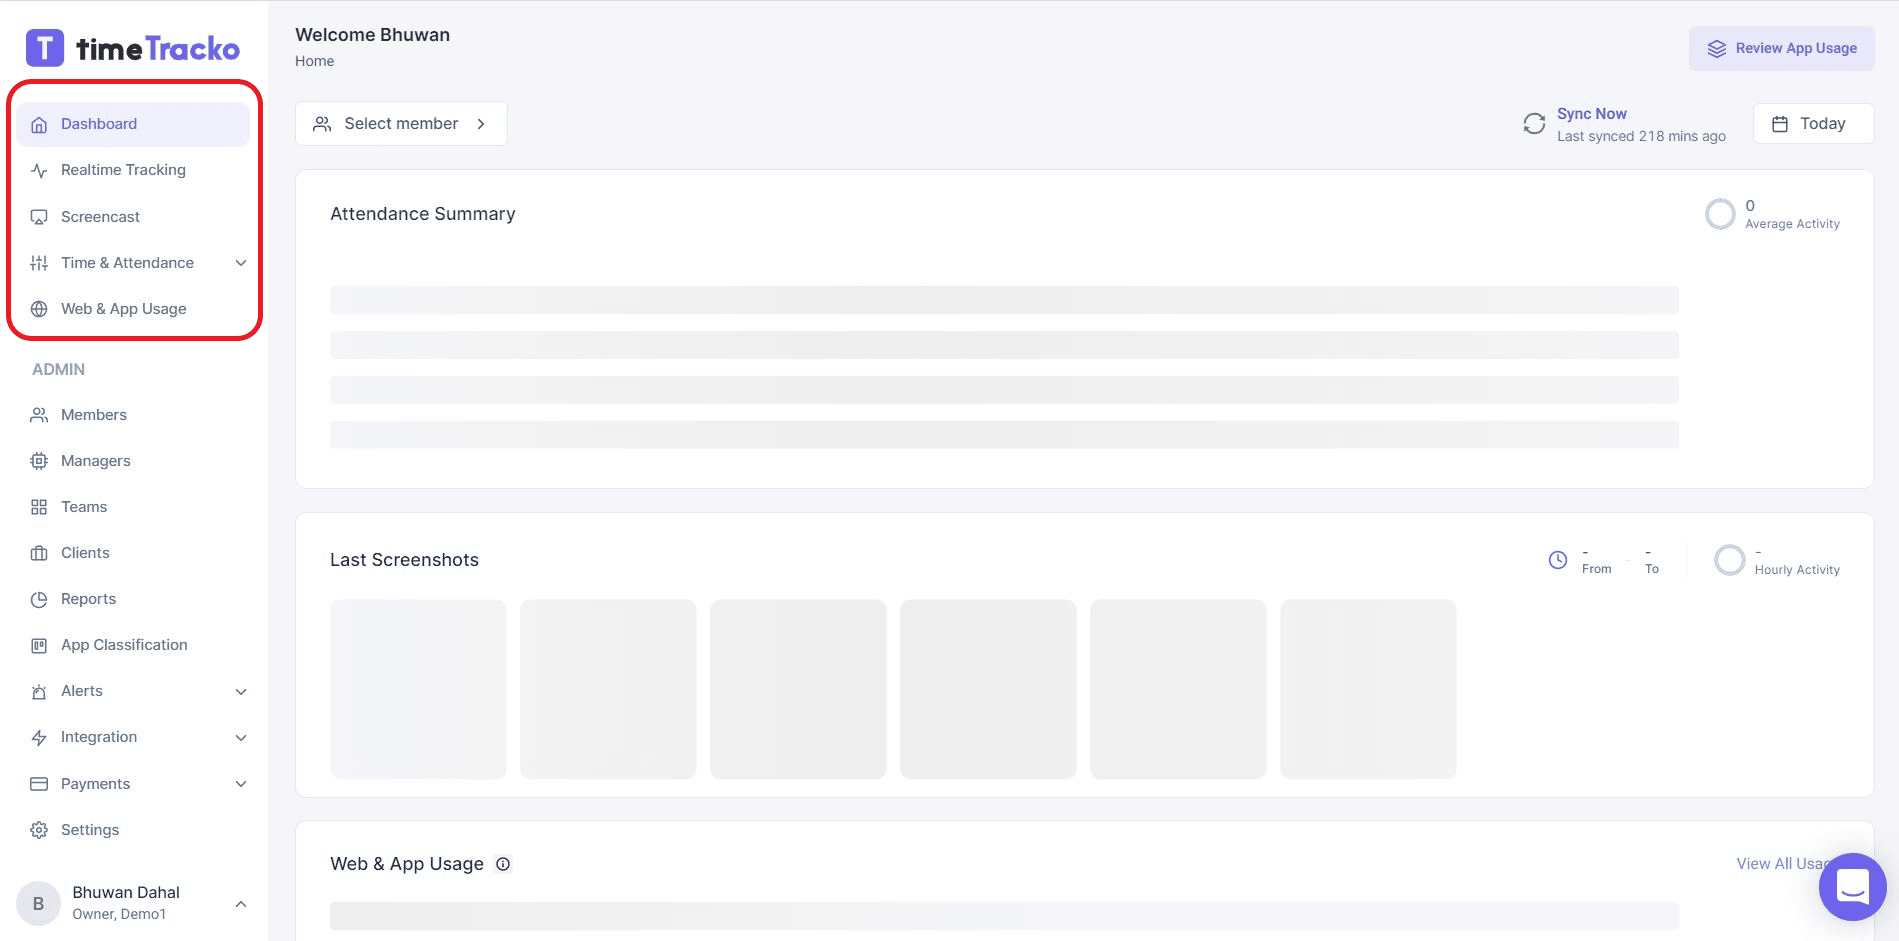
After you sign in, you’ll be redirected to your web dashboard. This is your control room. Click on the Dashboard tab in the left-side menu
-
To begin tracking time, you’ll need to download and install our desktop app.
Download timeTracko -
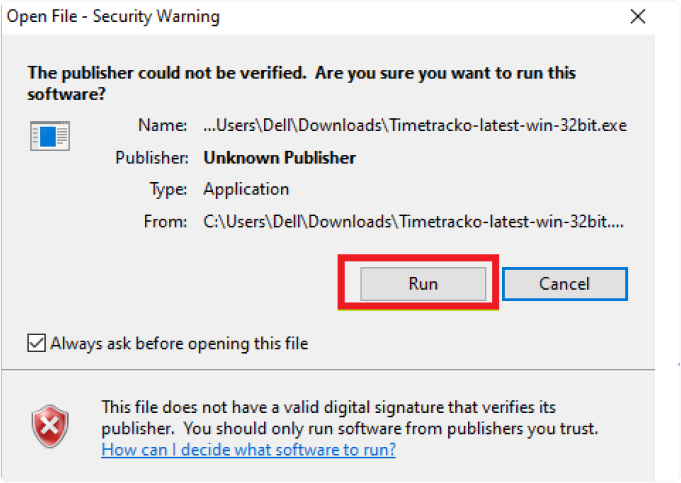
Launch the installer you’ve downloaded. A security warning might pop up to verify if you would want to proceed. Click Run
-
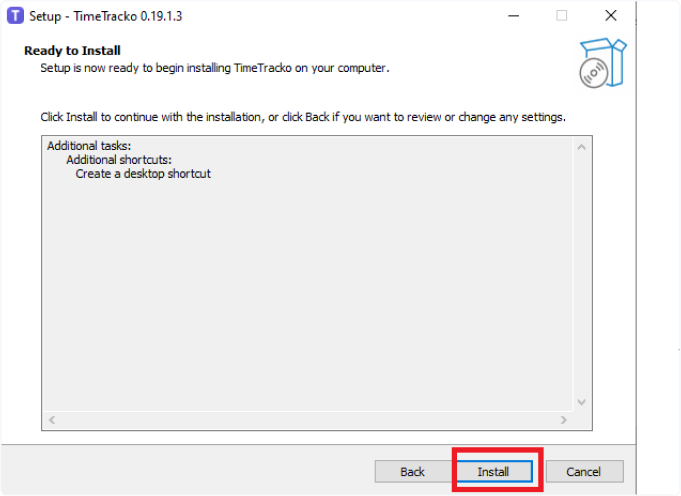
Allow timeTracko the access to a security control that it needs and proceed. After the setup tab appears on your screen, click on Install.
-
Once the installation is complete, click on the timeTracko widget and login into your timeTracko agent using the same credentials you used earlier.
Adding Members
Once you’ve created the workspace, it’s time to add other members to this workspace.
-
Login to your timeTracko web account. A list of menus appears on the left side of the web dashboard.
-
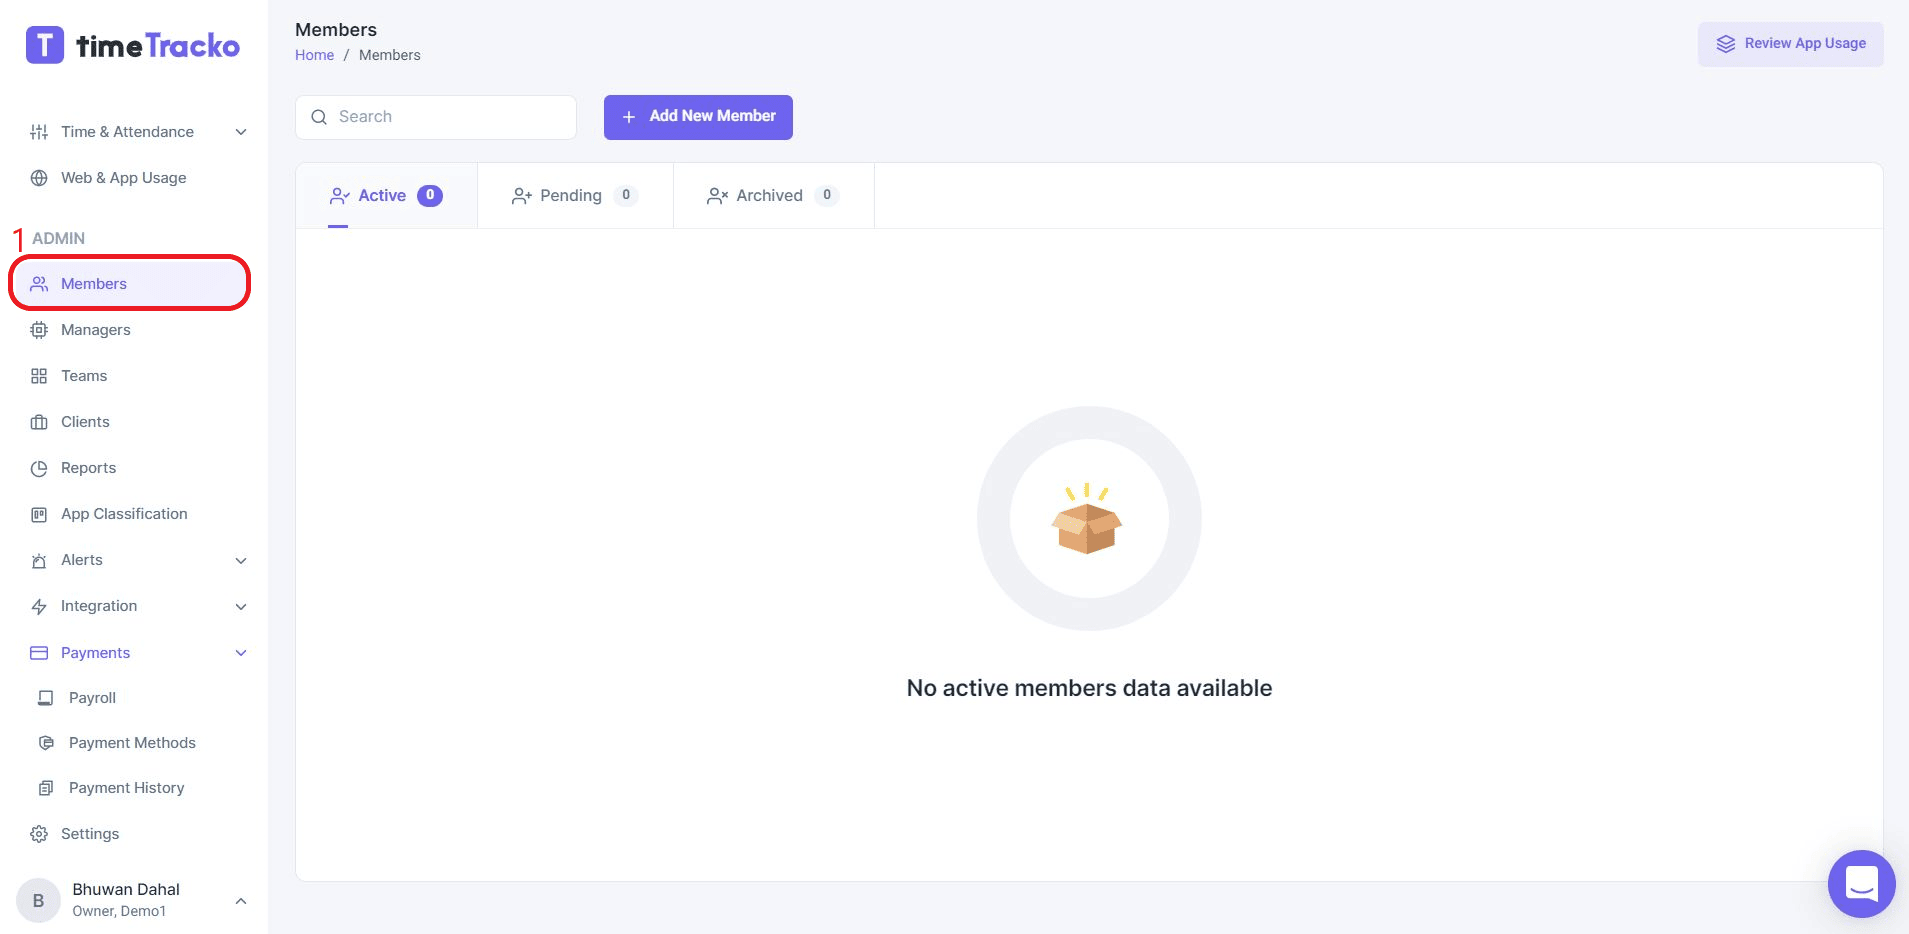
Under the Admin section, click on the Members tab. Then, click on the + Add New Member button.
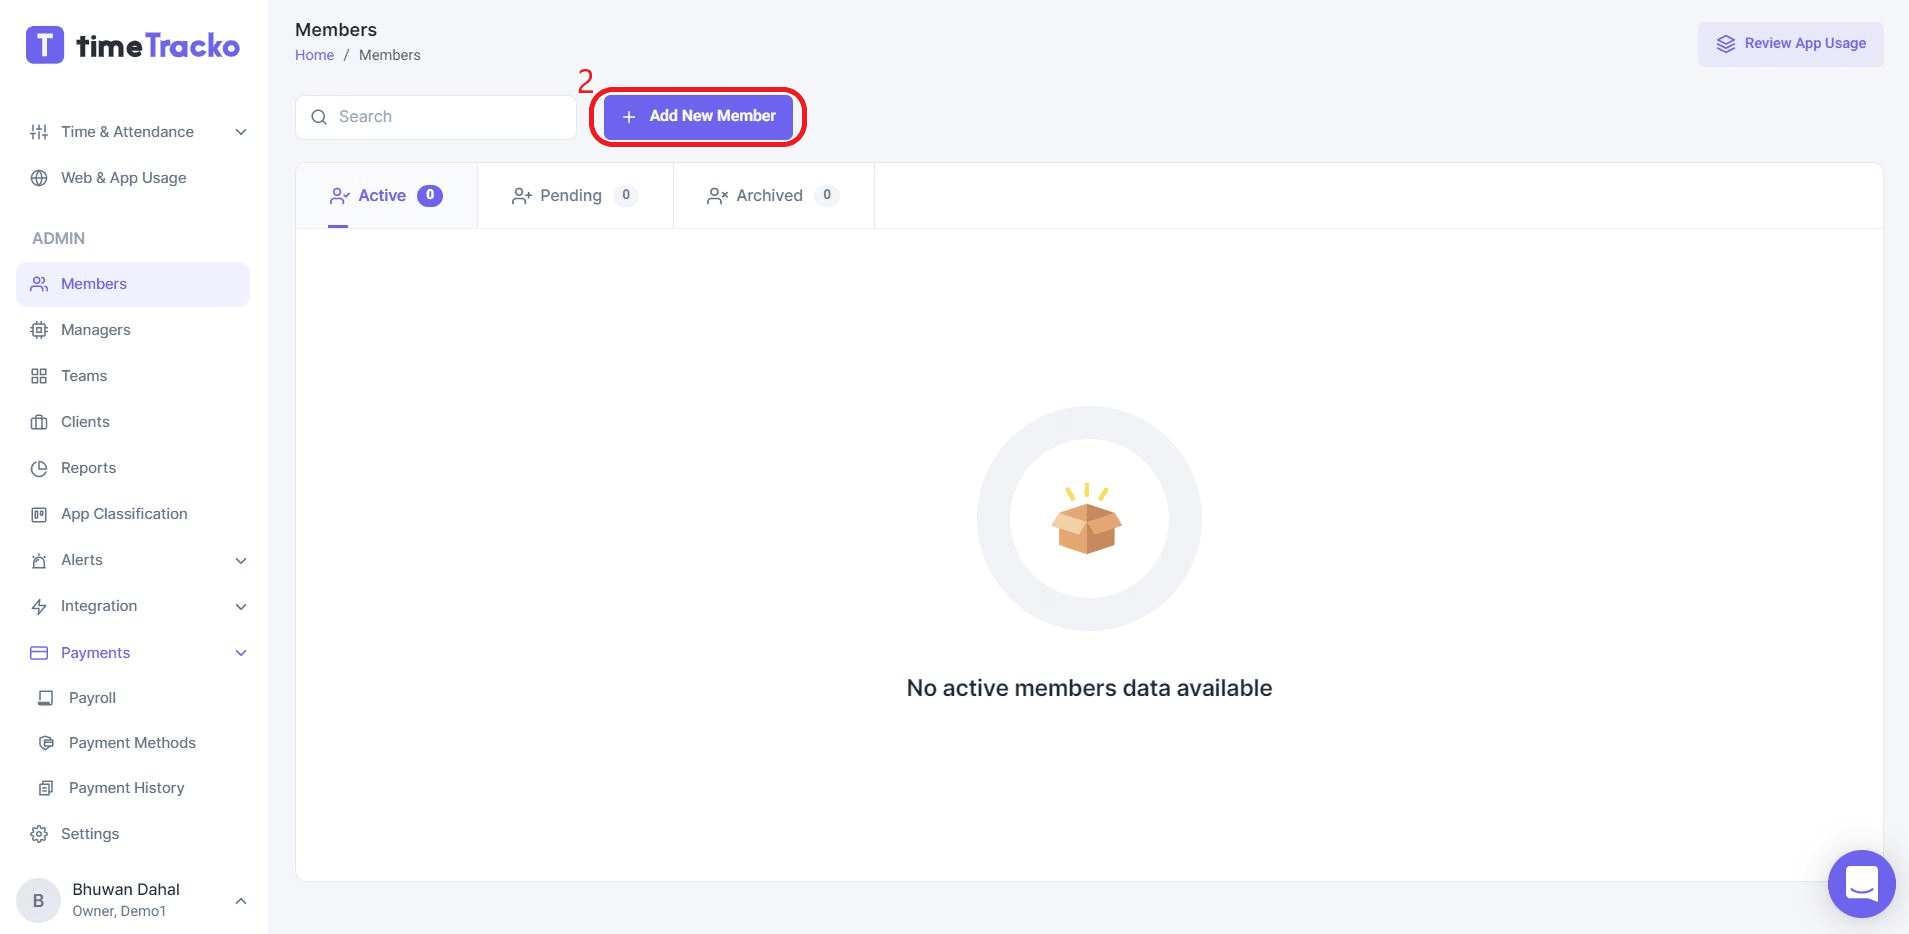
-
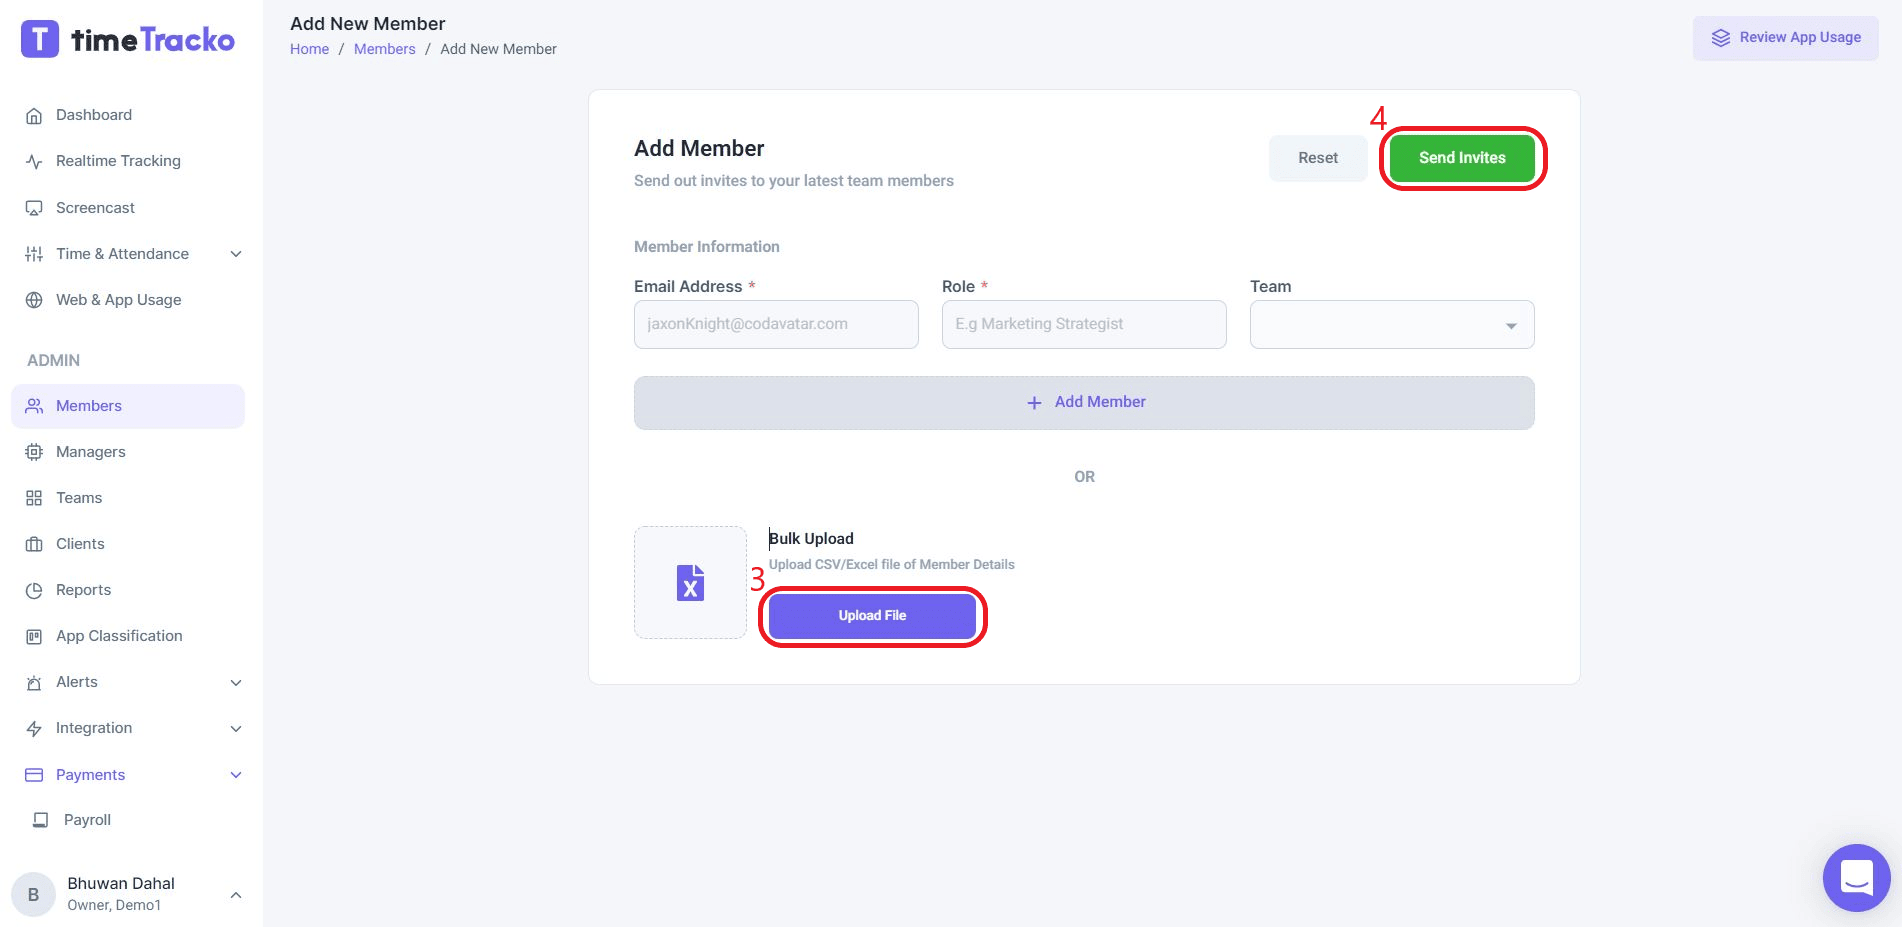
A new tab will appear on your screen. Enter the email address of the new member, their role in your company and which team they belong to. After filling out the necessary details, Click on Send Invites.
Note: You can also upload a CSV/Excel files to invite the member in bulk. For that tap on the Upload File button.
-
Your new member will receive an invitation e-mail with a confirmation link to verify if they would like to join. Once they click on the link, they’ll be redirected to a sign-up page.
-
All the new member needs to do is to use the same email address for signing up in which the invitation was sent. They can set a password for their timeTracko account and click sign up. They’ll be now automatically added to your workspace as a new member.
Adding Managers
If you have hundreds of employees working in your organization or you have multiple teams with separatefunctions, it's not easy to manage all of it by yourself. Add managers and give them access to monitor theirown teams.
-
Login to your timeTracko web account. A list of menus will appear on the left side of the web dashboard.
-
Under the Admin section, click on the Managers tab. Then, click on the + Add New Manager button.

-
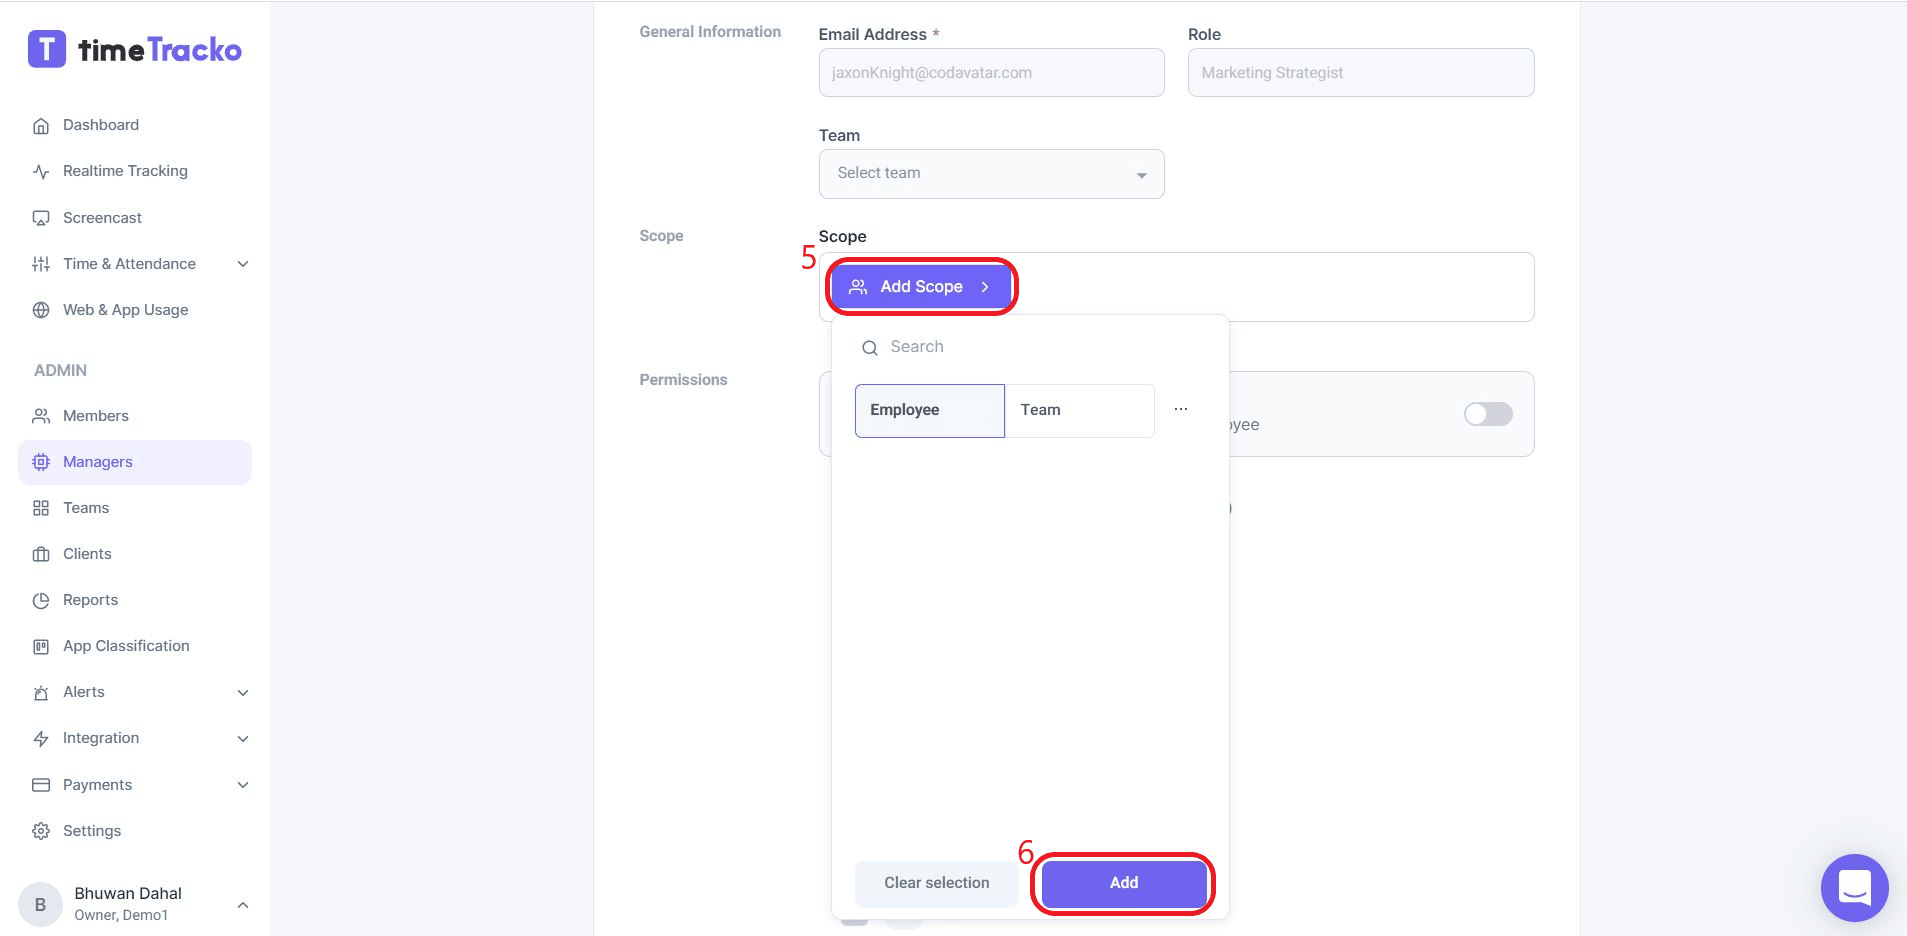
Fill out the General Information including the email address of the new manager, their role as well as the team they are about to manage.

-
If you want the manager to have access to the records of certain employees only, you can enter those names in the Scope tab.
-
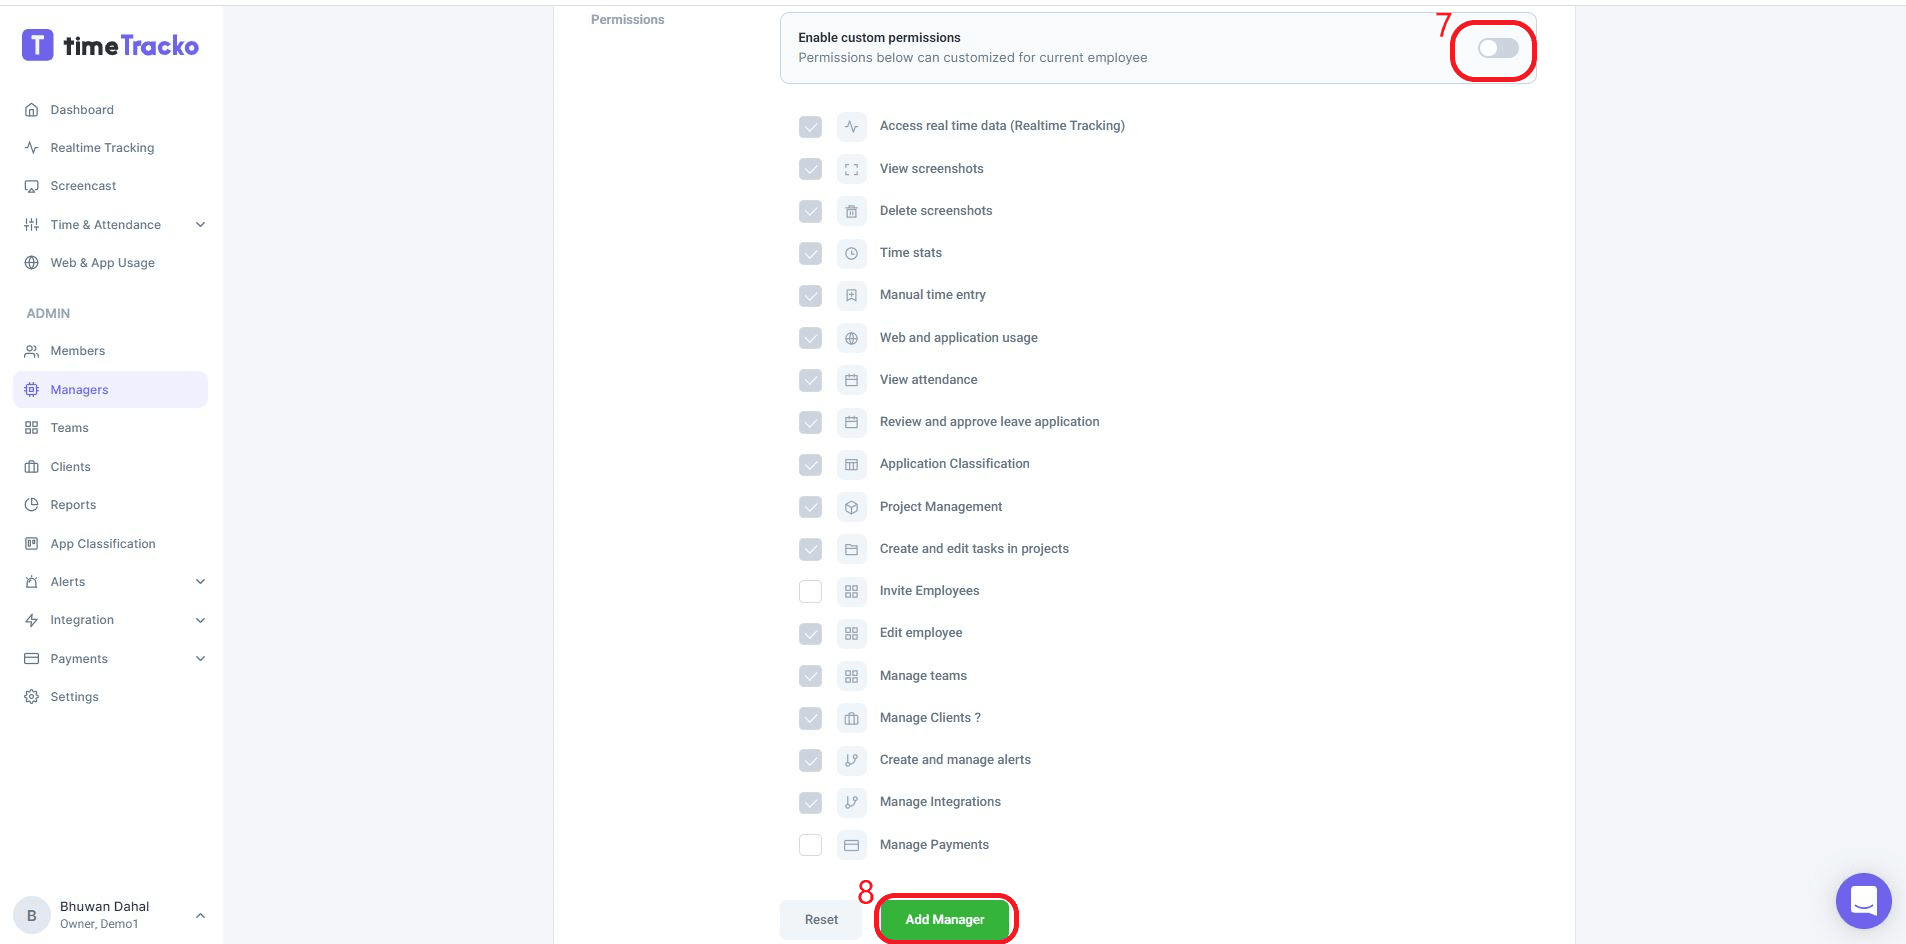
As the owner of the workspace, you have access to all the details available. You can customize the amount of information accessible to any manager in the Permissions tab
-
Finally, tap on Add Manager to complete the process.
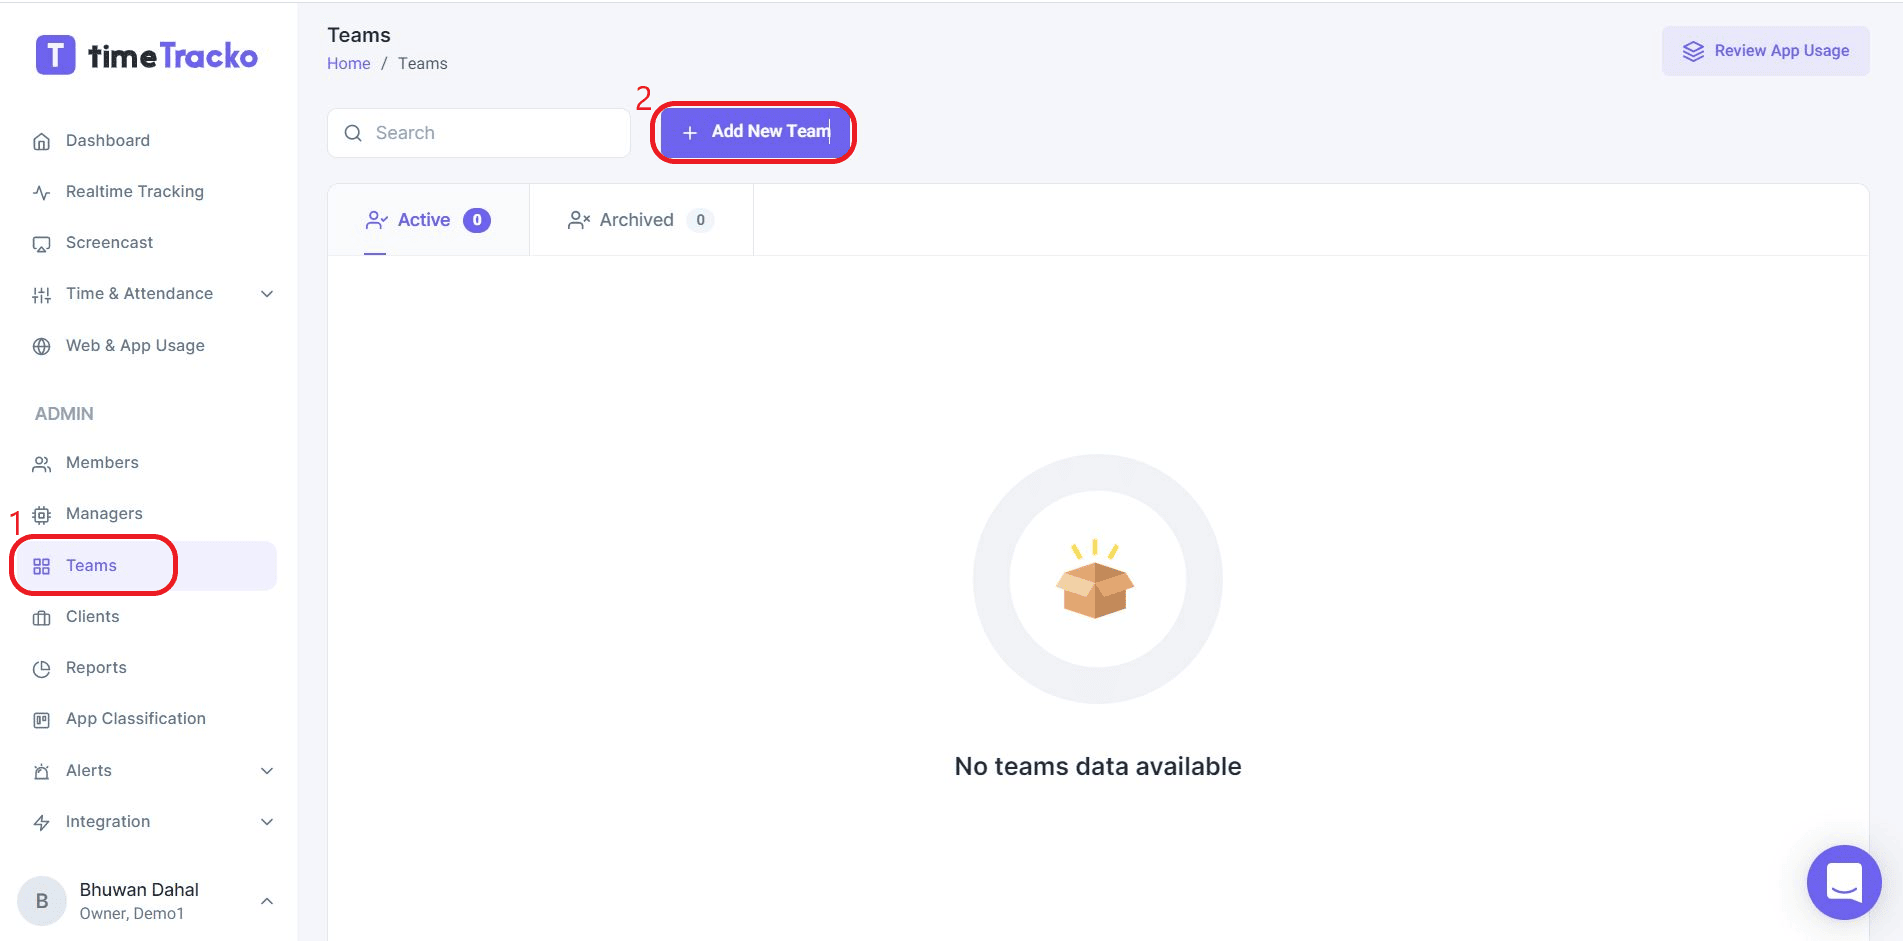
Creating Teams
There is no way for you to manage all your employees by yourself. As a result, it is necessary for you to form teams/departments. With timeTracko, you can create teams and assign members or managers to those teams.
After you add a new member to a workspace, you can create a team/department to assign a specific task.
-
To create a new team, tap on Teams from the left column dashboard. After that, click on + Add New Team to create a new team.
-
Now enter the basic information like Cover Image, Team Name, and Team Description.
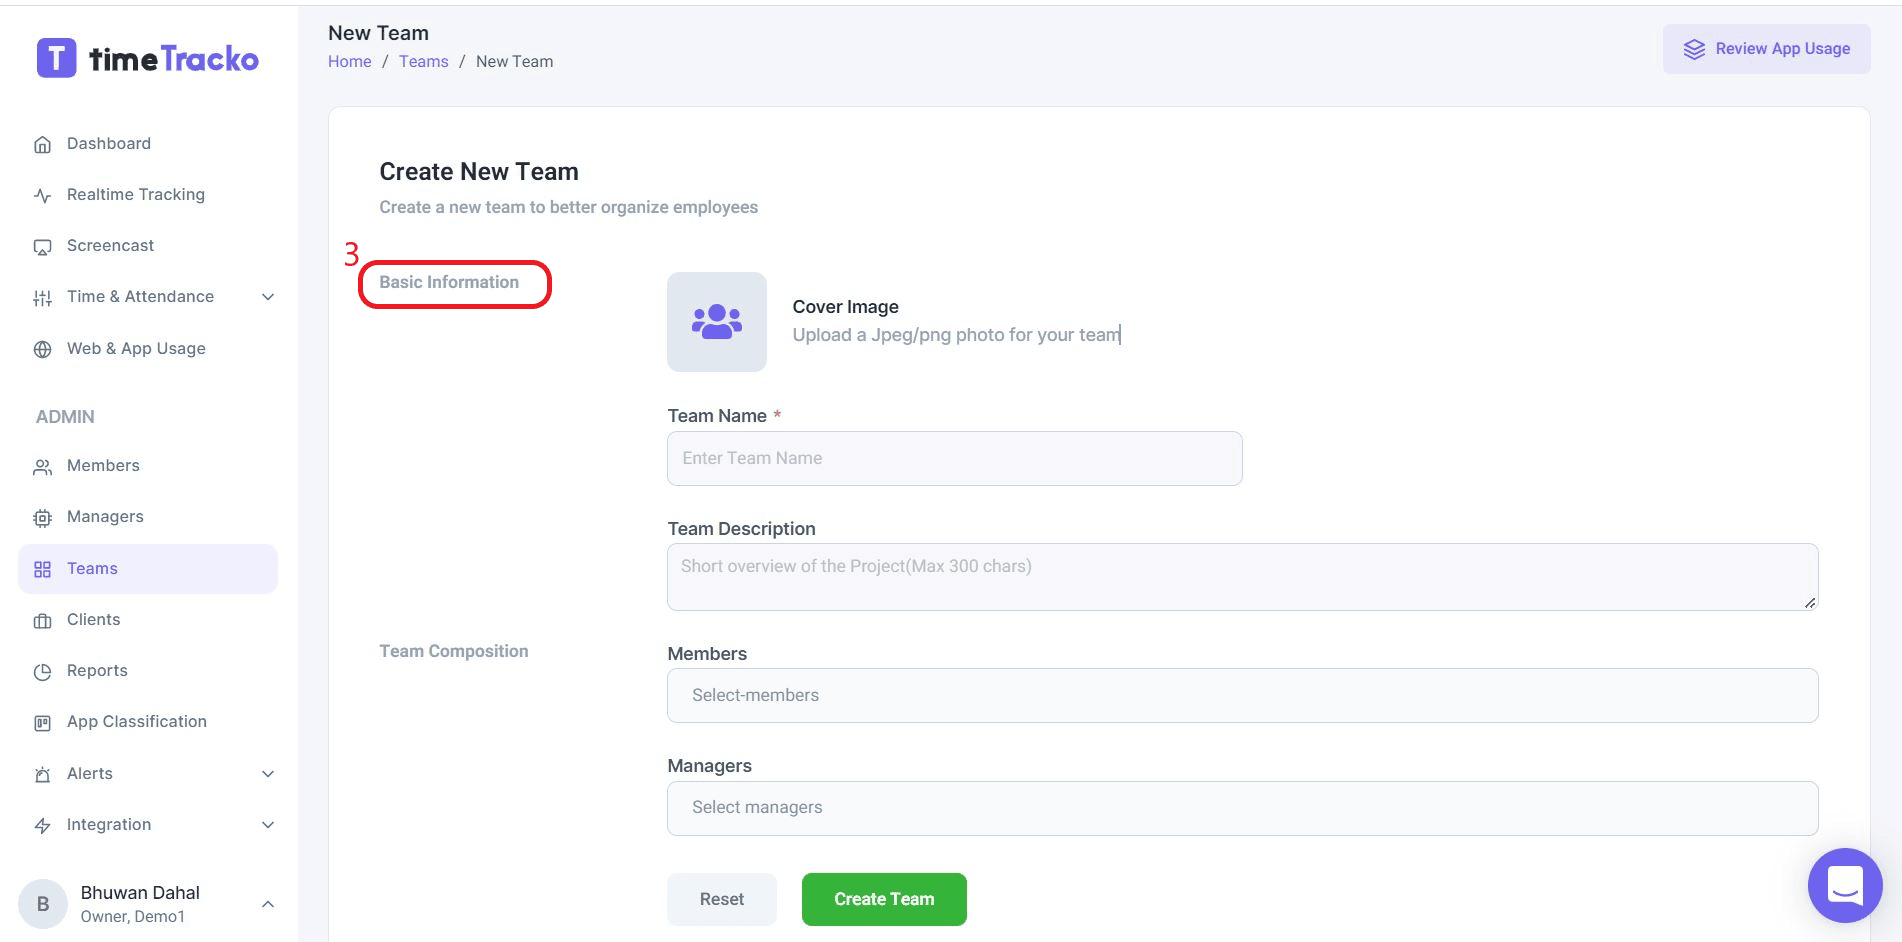
-
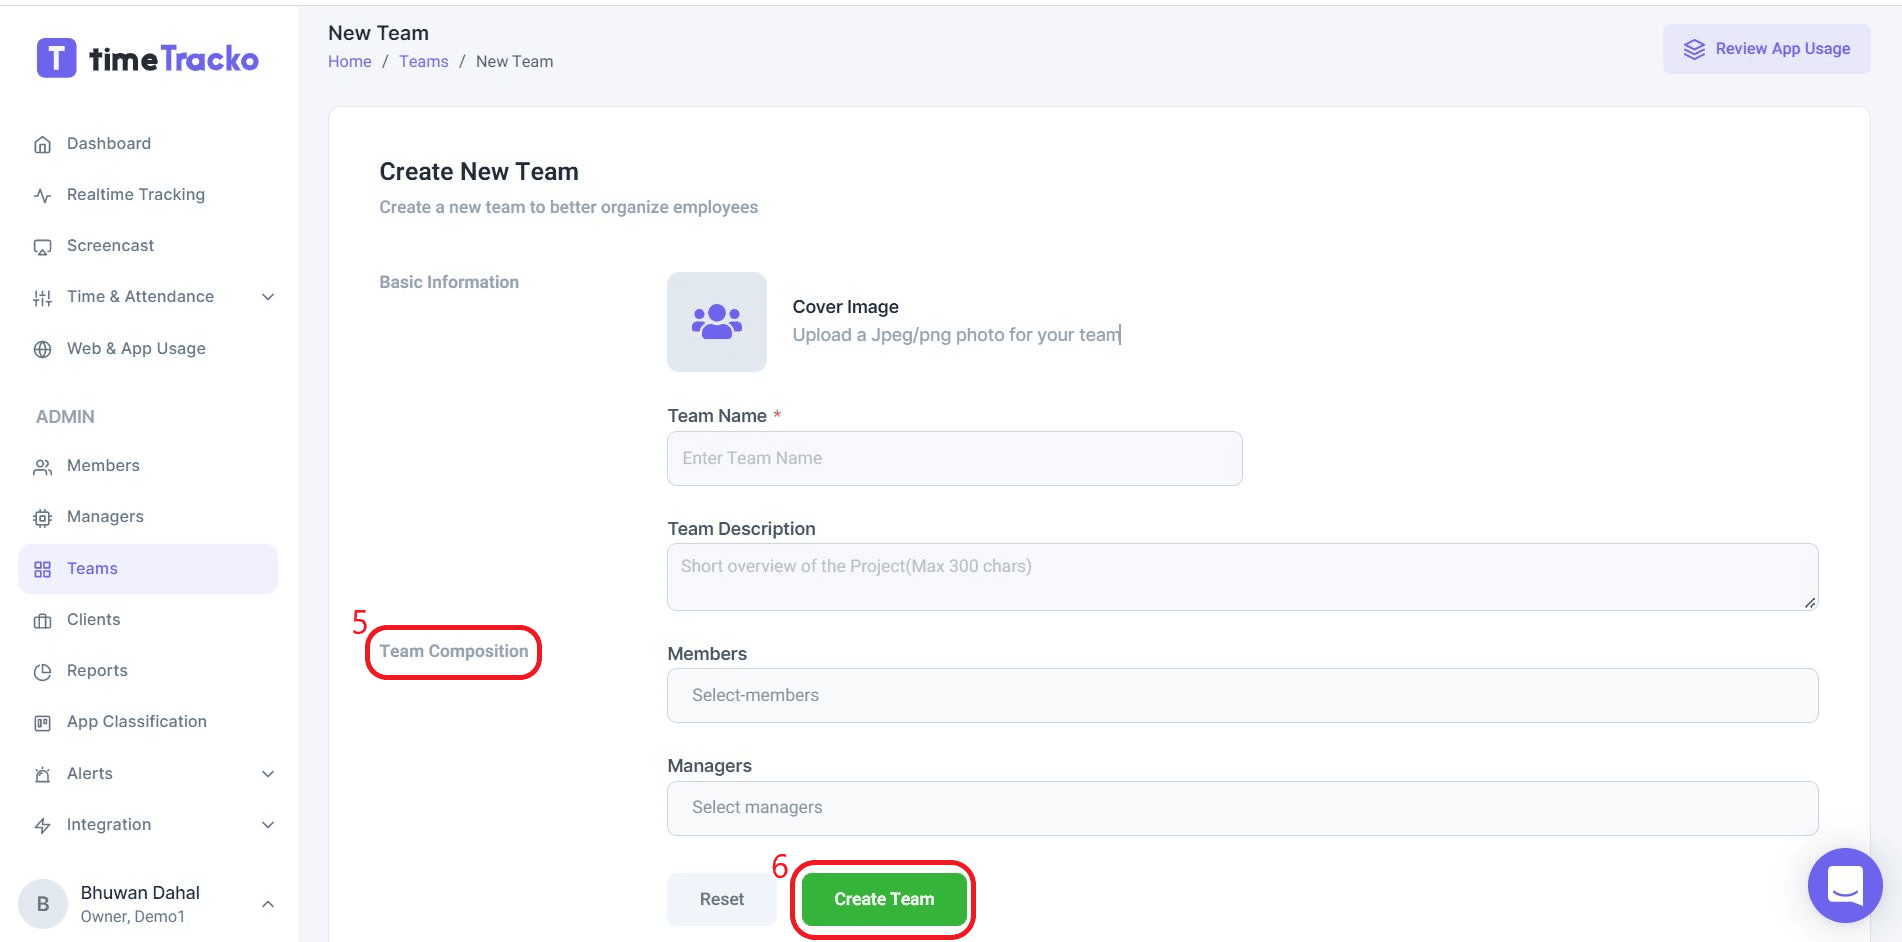
Furthermore, Select the Members for the team and then assign Managers to the team. Finally, tap on Create Team.
Reports
Reports help you analyze and have an insight into the attitude of your employees. timeTracko provides you with daily attendance reports, time reports, productivity reports, and activity reports where you can search and review the history of your employees.
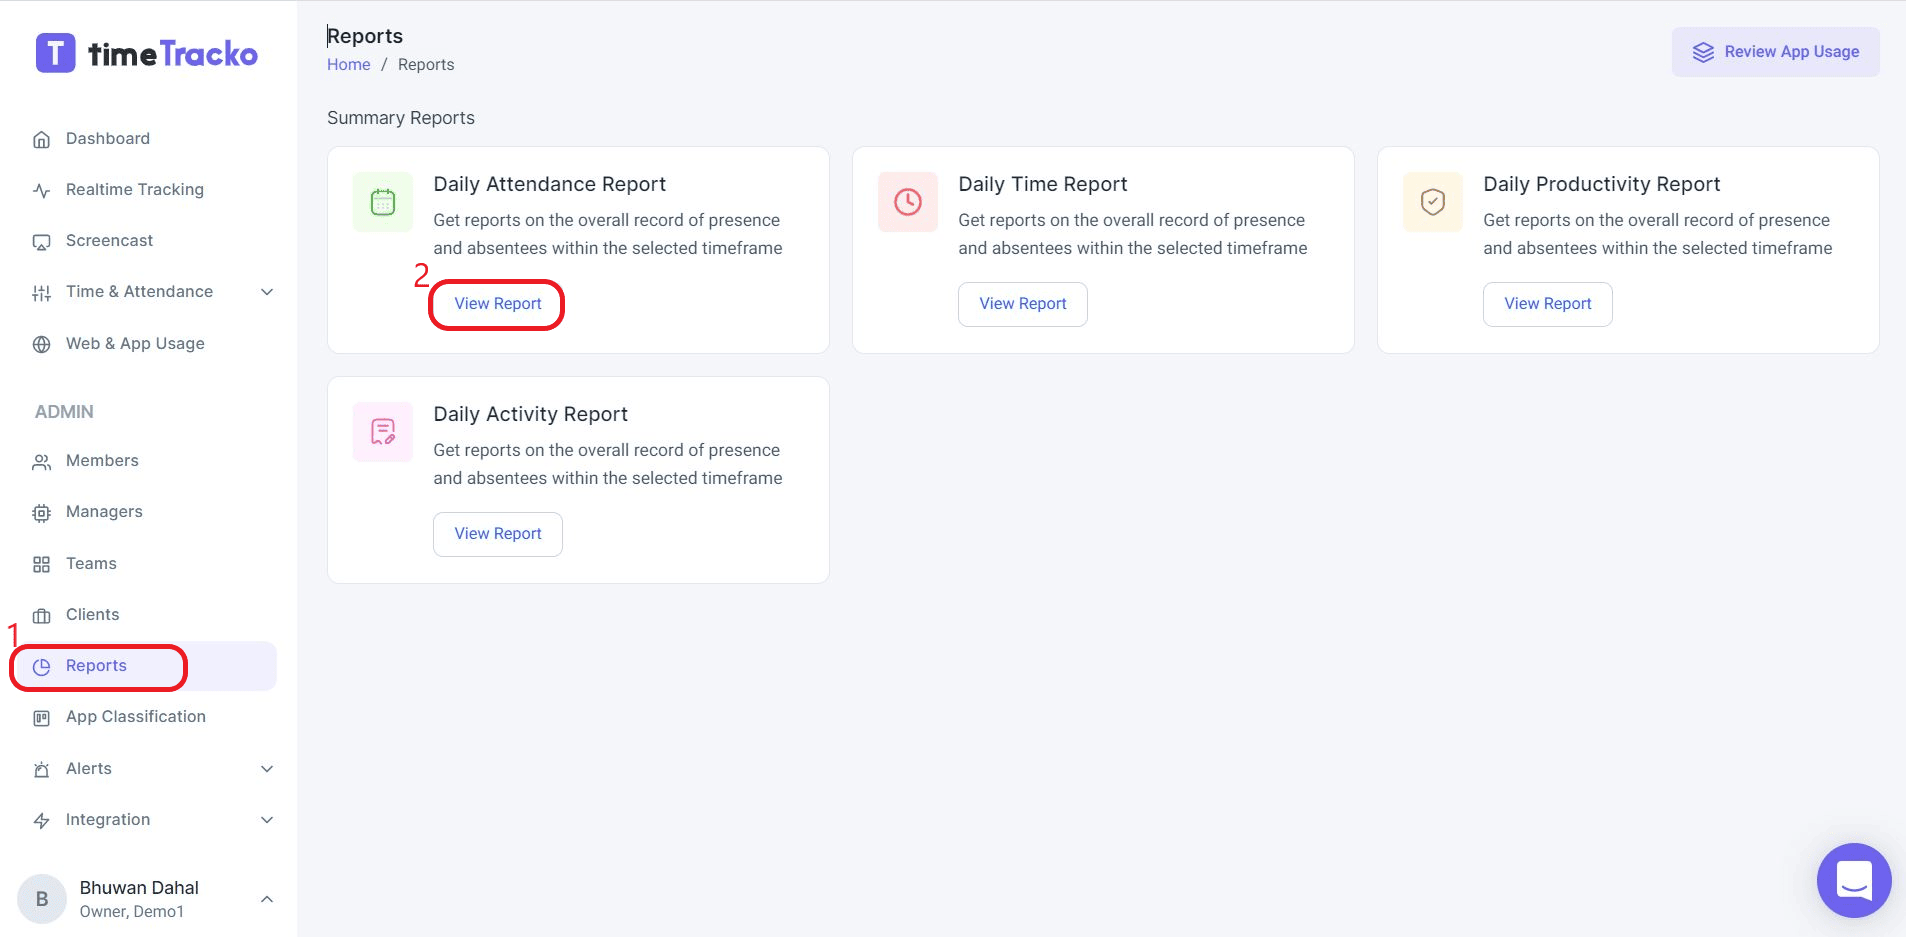
Daily Attendance Report
Here in this section, you will get the reports on the overall record of presence and absentees within the selected timeframe. You can get the overall information on the attendance of an employee including the office hours, office time, and activities level.
Here is how you can view Daily Attendance Report.
-
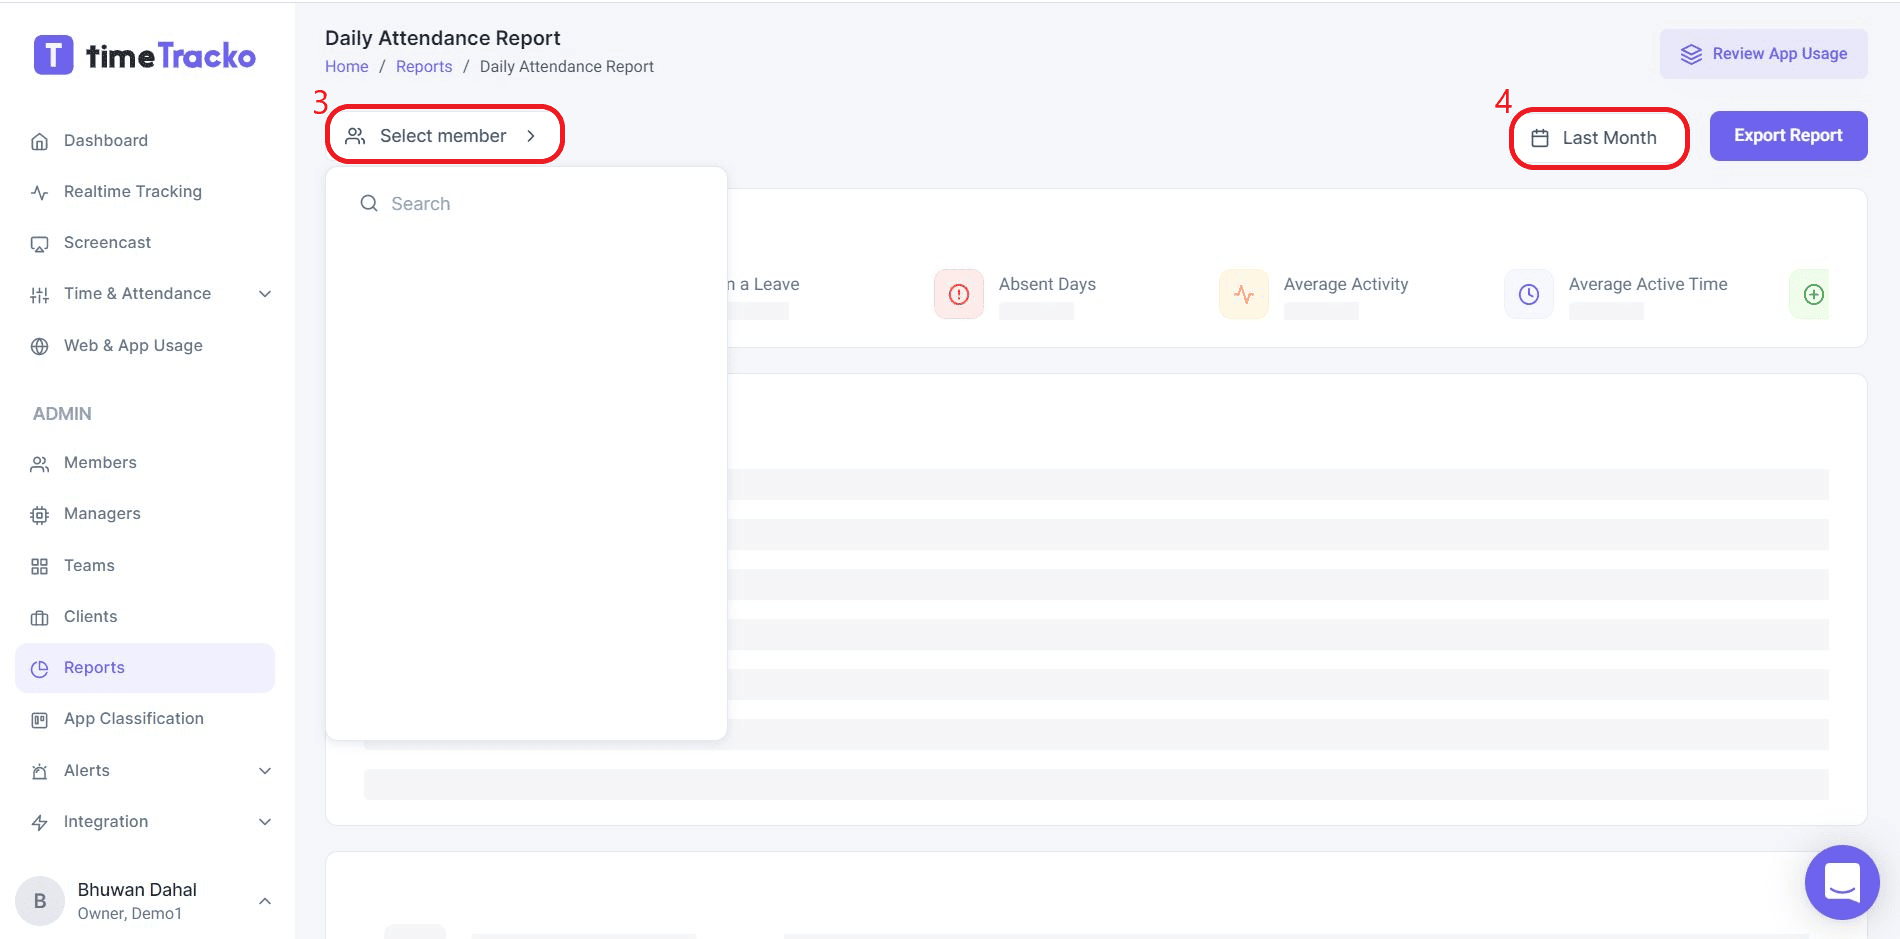
To get the Daily Attendance Report, click on Reports, find Daily Attendance Report, and select View Report.
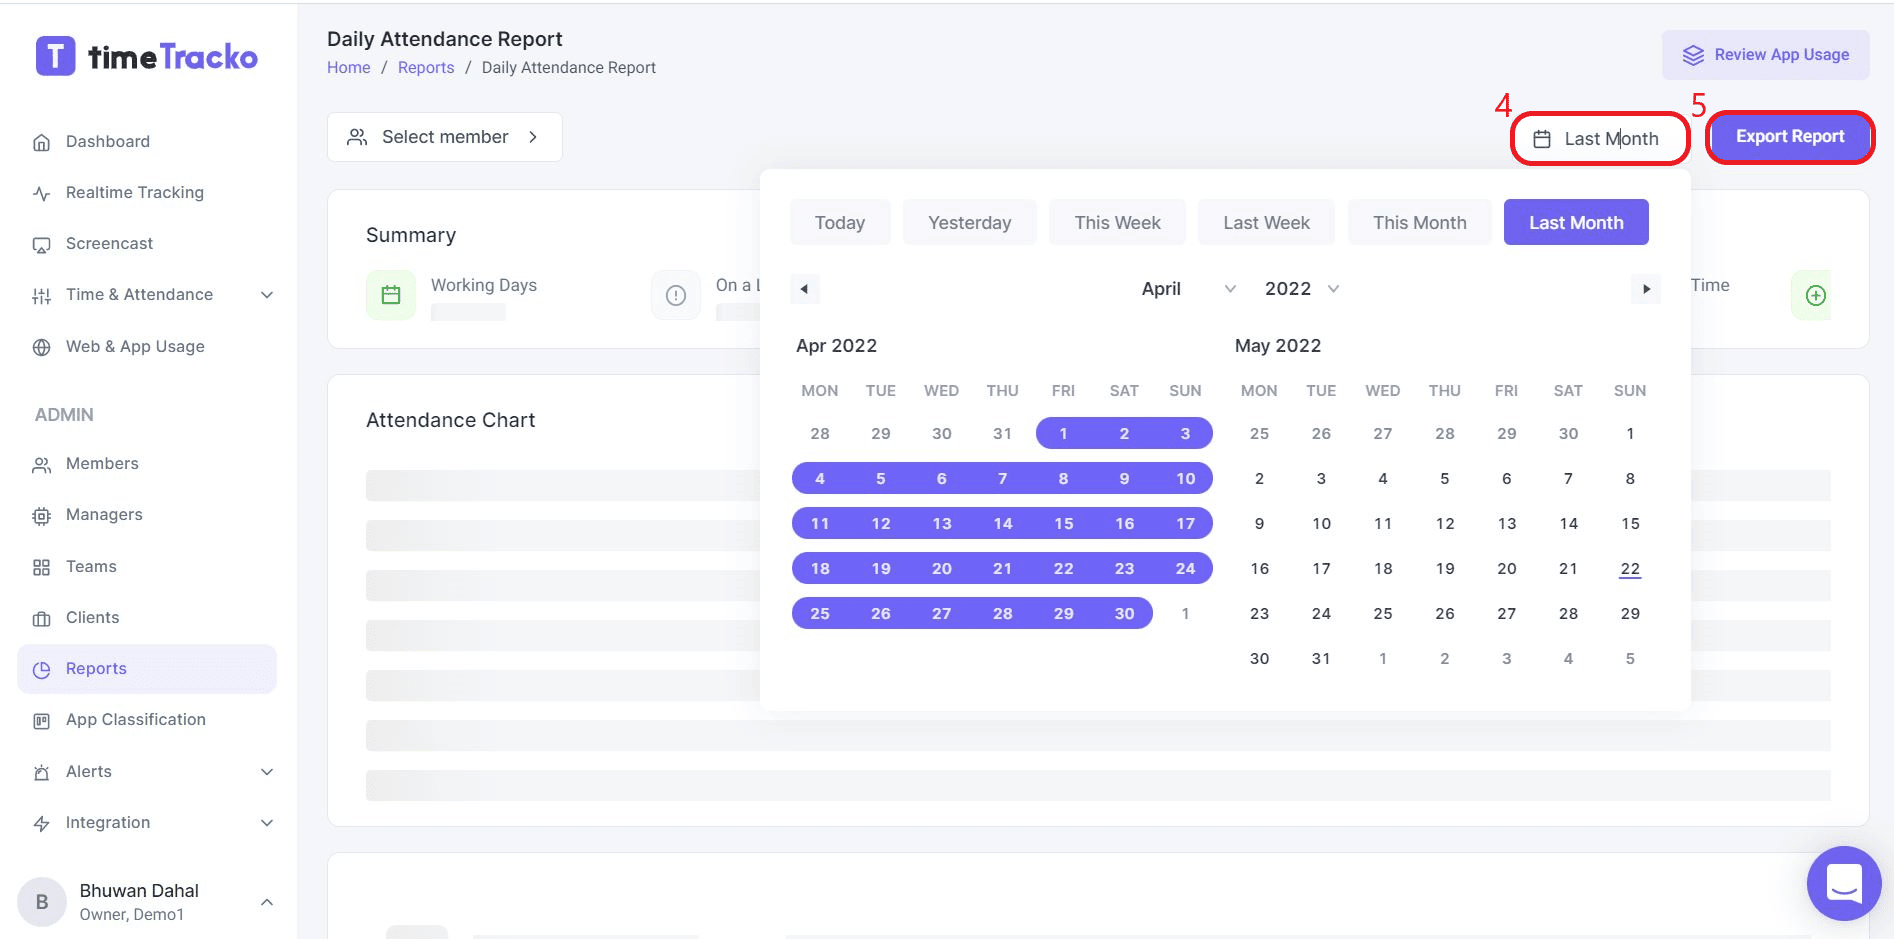
-
Select the users whose report you want to view. Specify the dates or time frames so that you can narrow down the information to be reported.
-
Export the reports by clicking on “Export report” button on the top right side of the dashboard.
Daily Time Report
In this section, you will get the reports on the overall record of office hours, Clock In and Clock Out time, Break duration, and Idle time along with a timestamp.
Here is how you can view Daily Time Report.
-
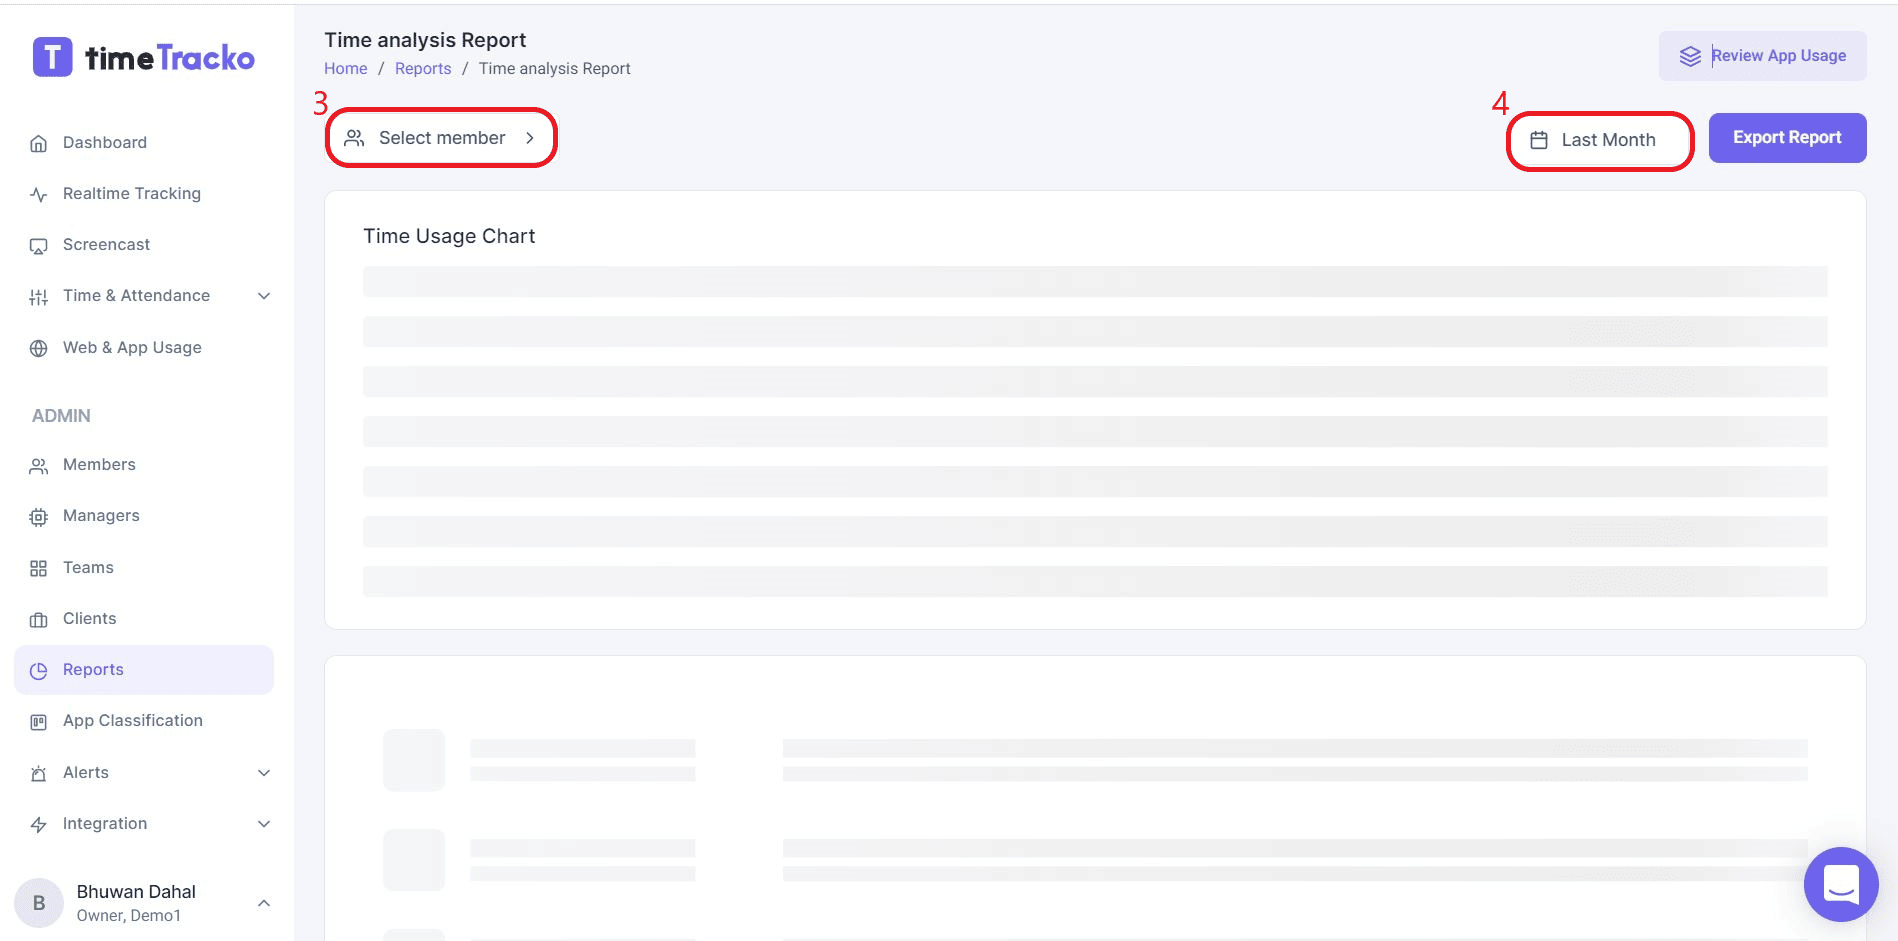
To view the Daily Time Report, click on Reports, find Daily Time Report and select View Report.

-
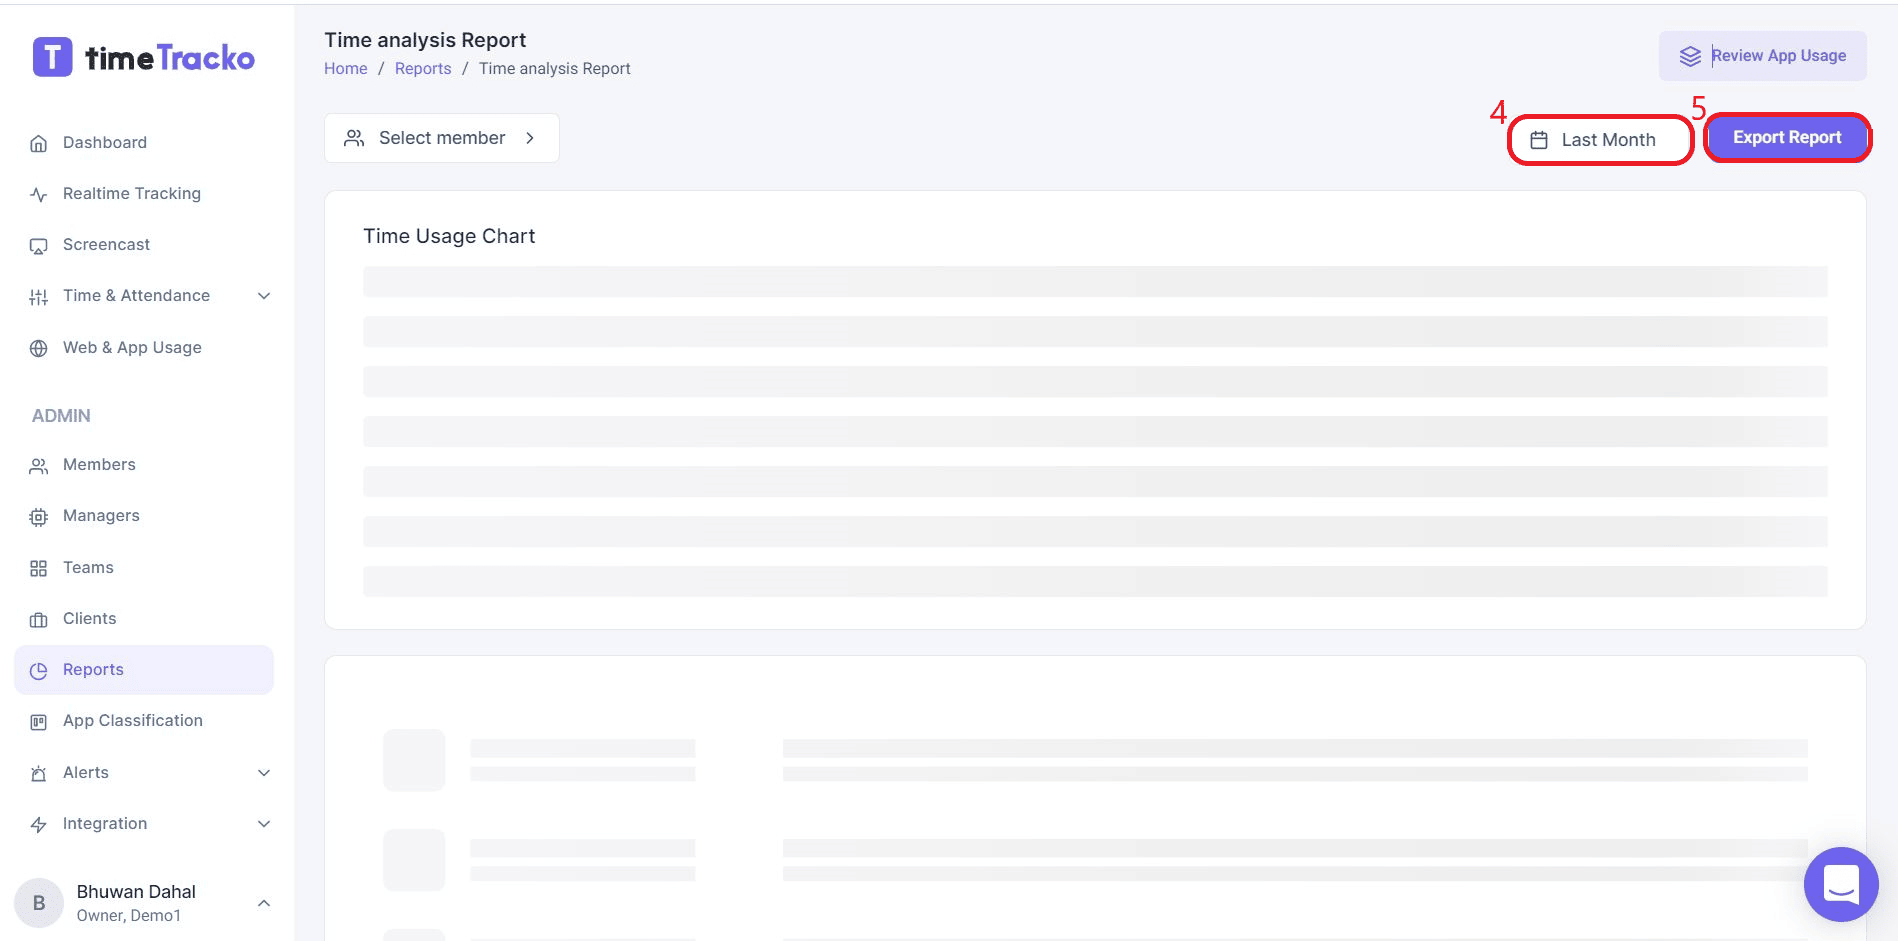
Now tap on Select member whose report you want to view. After that, specify the dates or time frames so that you can narrow down the information to be reported.
-
Export the reports by clicking on “Export report” button on the top right side of the dashboard.
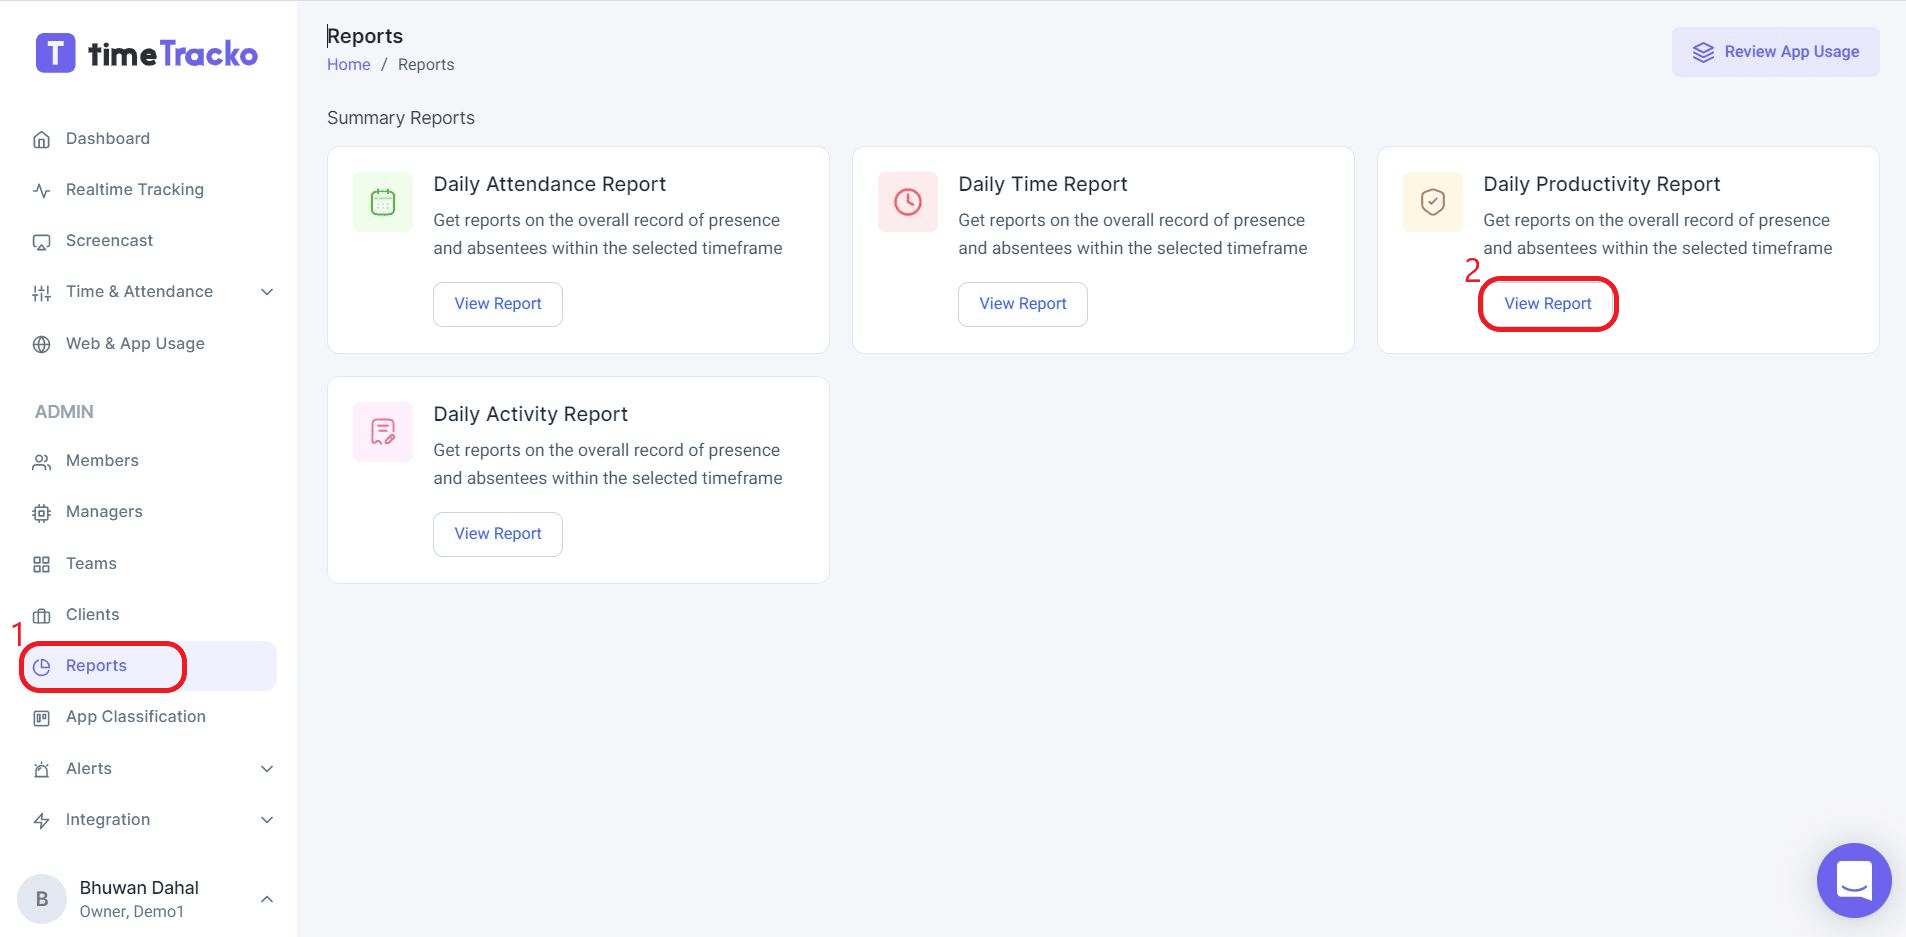
Daily Productivity Report
Here in this section, you will get reports on the productive, unproductive and unclassified time spent by employees during their office hours along with their timestamps.
Here is how you can view Daily Productivity Report.
-
To view the Daily Productivity Report, click on Reports, find Daily Productivity Report, and select View Report.
-
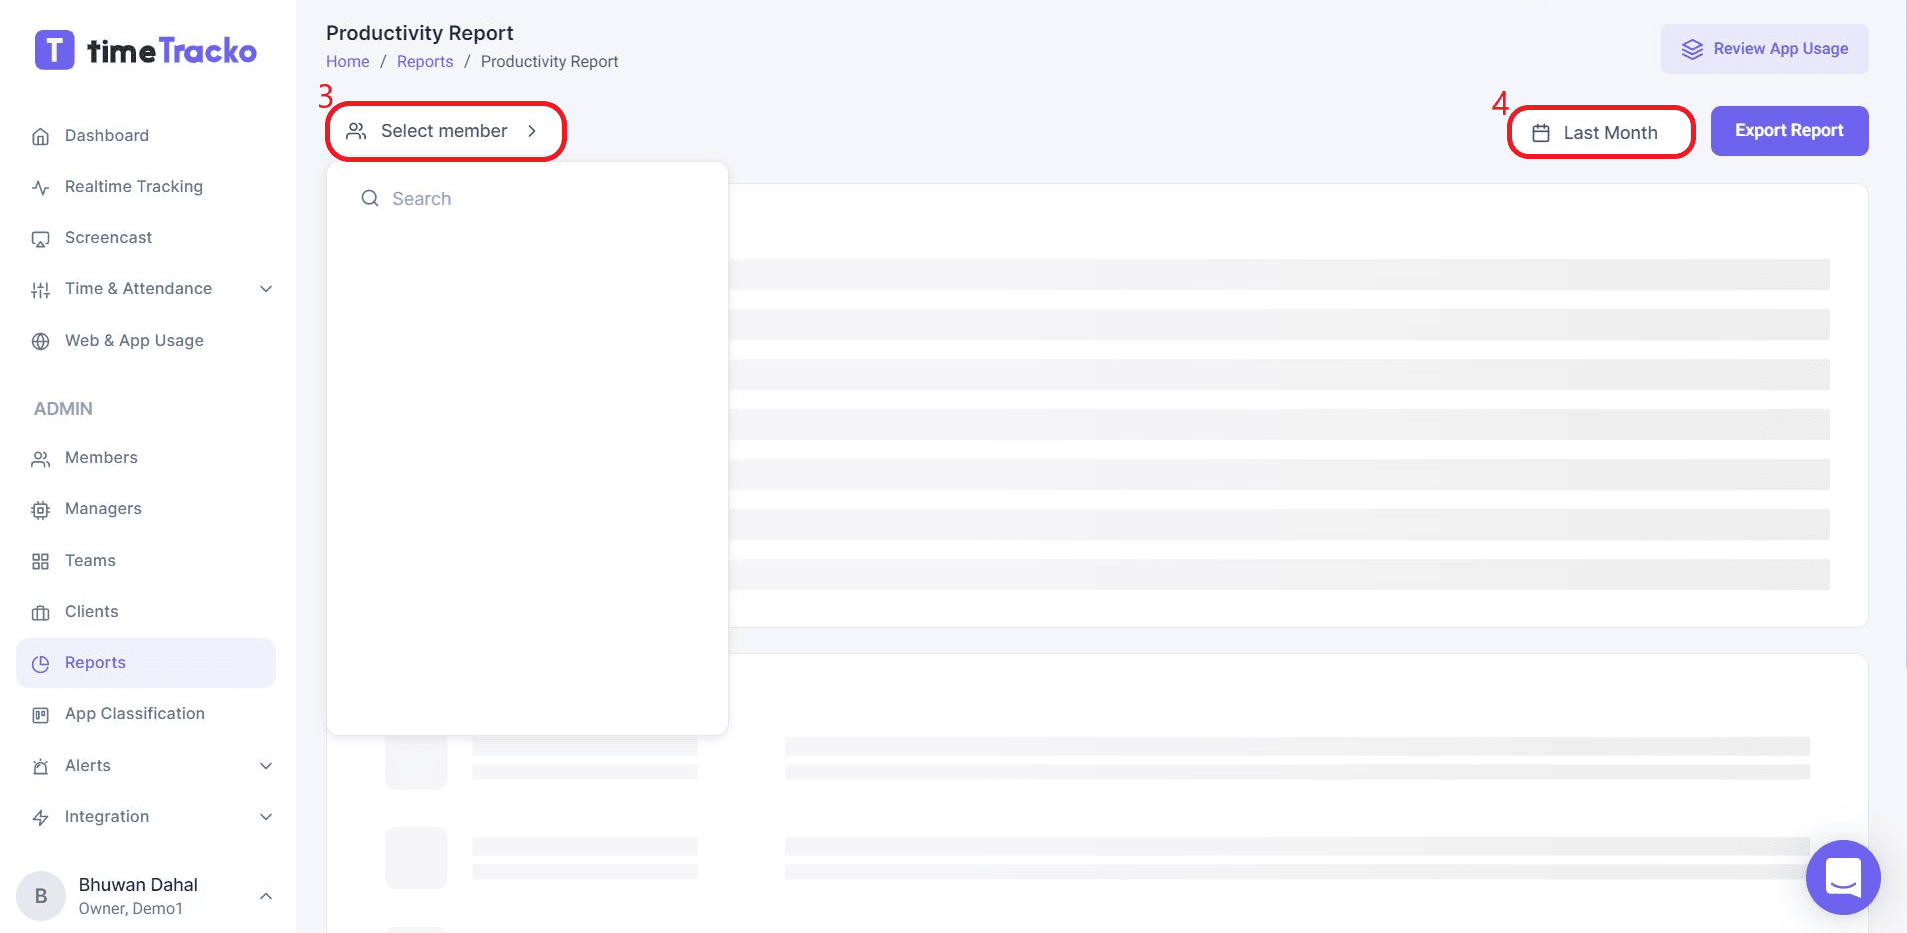
Now tap on Select member whose report you want to view. After that, specify the dates or time frames so that you can narrow down the information to be reported.
-
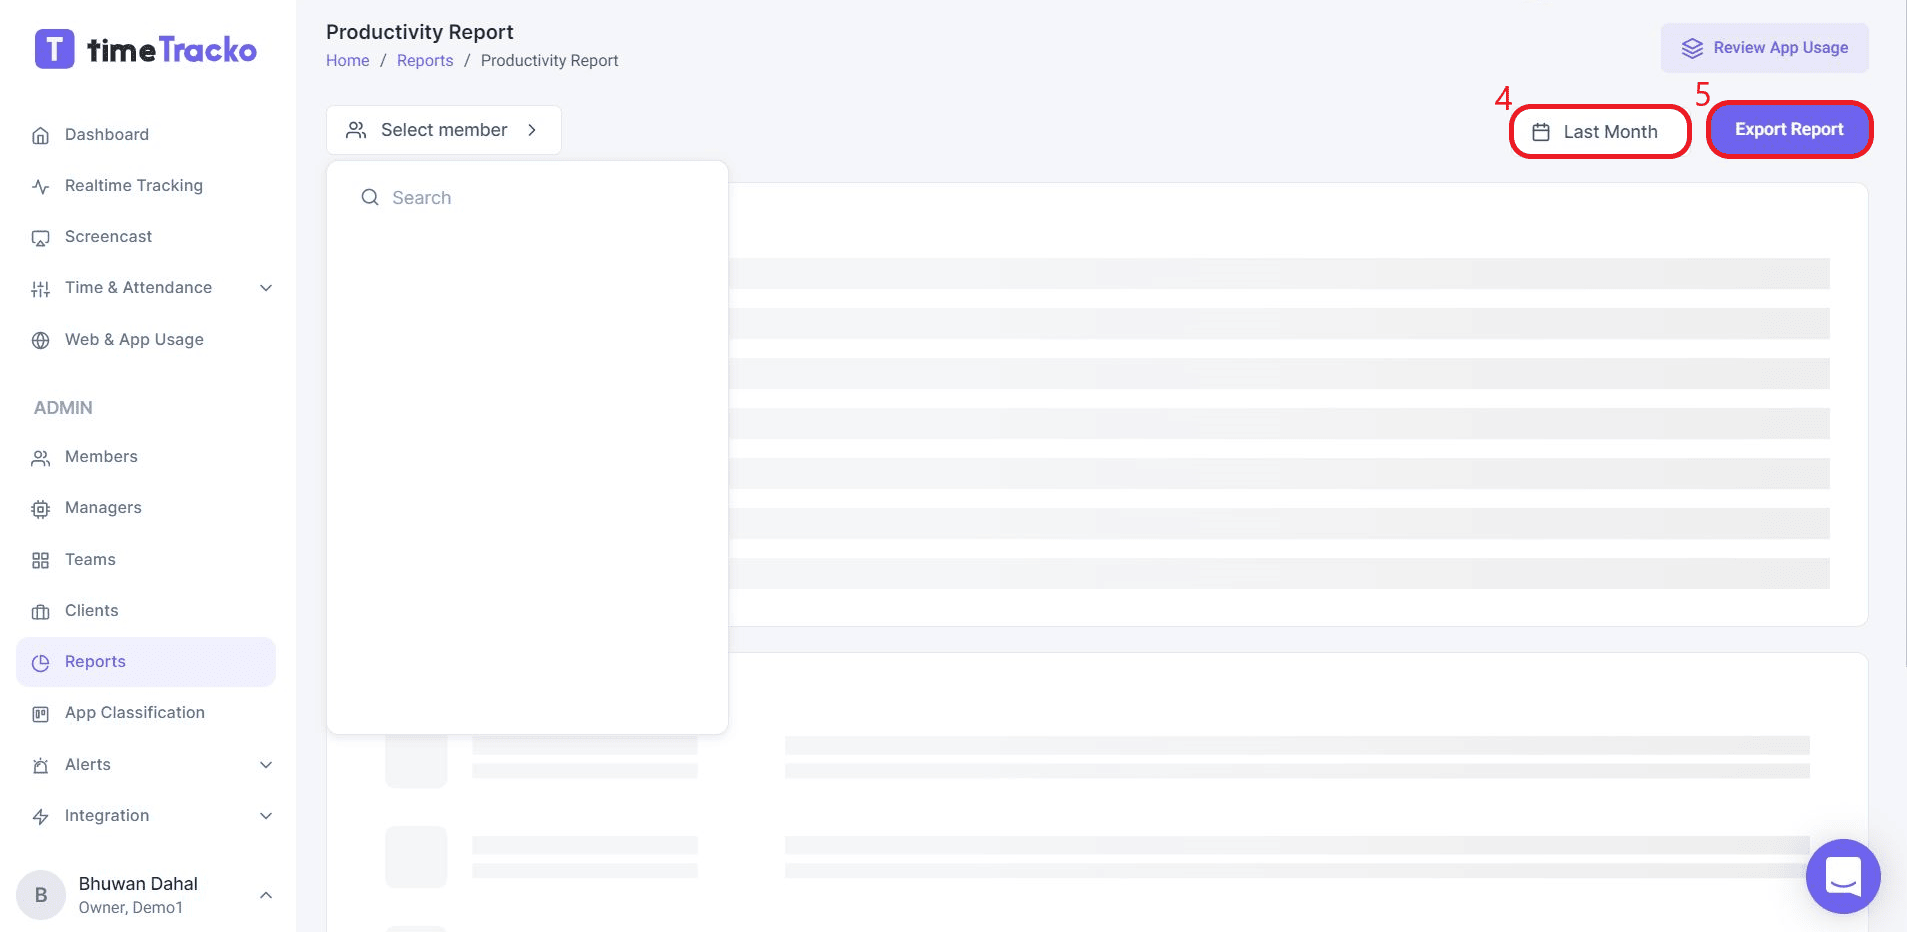
Export the reports by clicking on “Export report” button on the top right side of the dashboard.
Daily Activity Report
In this section, you will get the reports on the overall record of the activities performed by the employees including active hours and activity level with timestamps.
Here is how you can view Daily Activity Report.
-
To view the Daily Activity Report, click on Reports, find Daily Activity Report, and select View Report.

-
Now tap on Select member whose report you want to view. After that, specify the dates or time frames so that you can narrow down the information to be reported.

-
Export the reports by clicking on “Export report” button on the top right side of the dashboard.
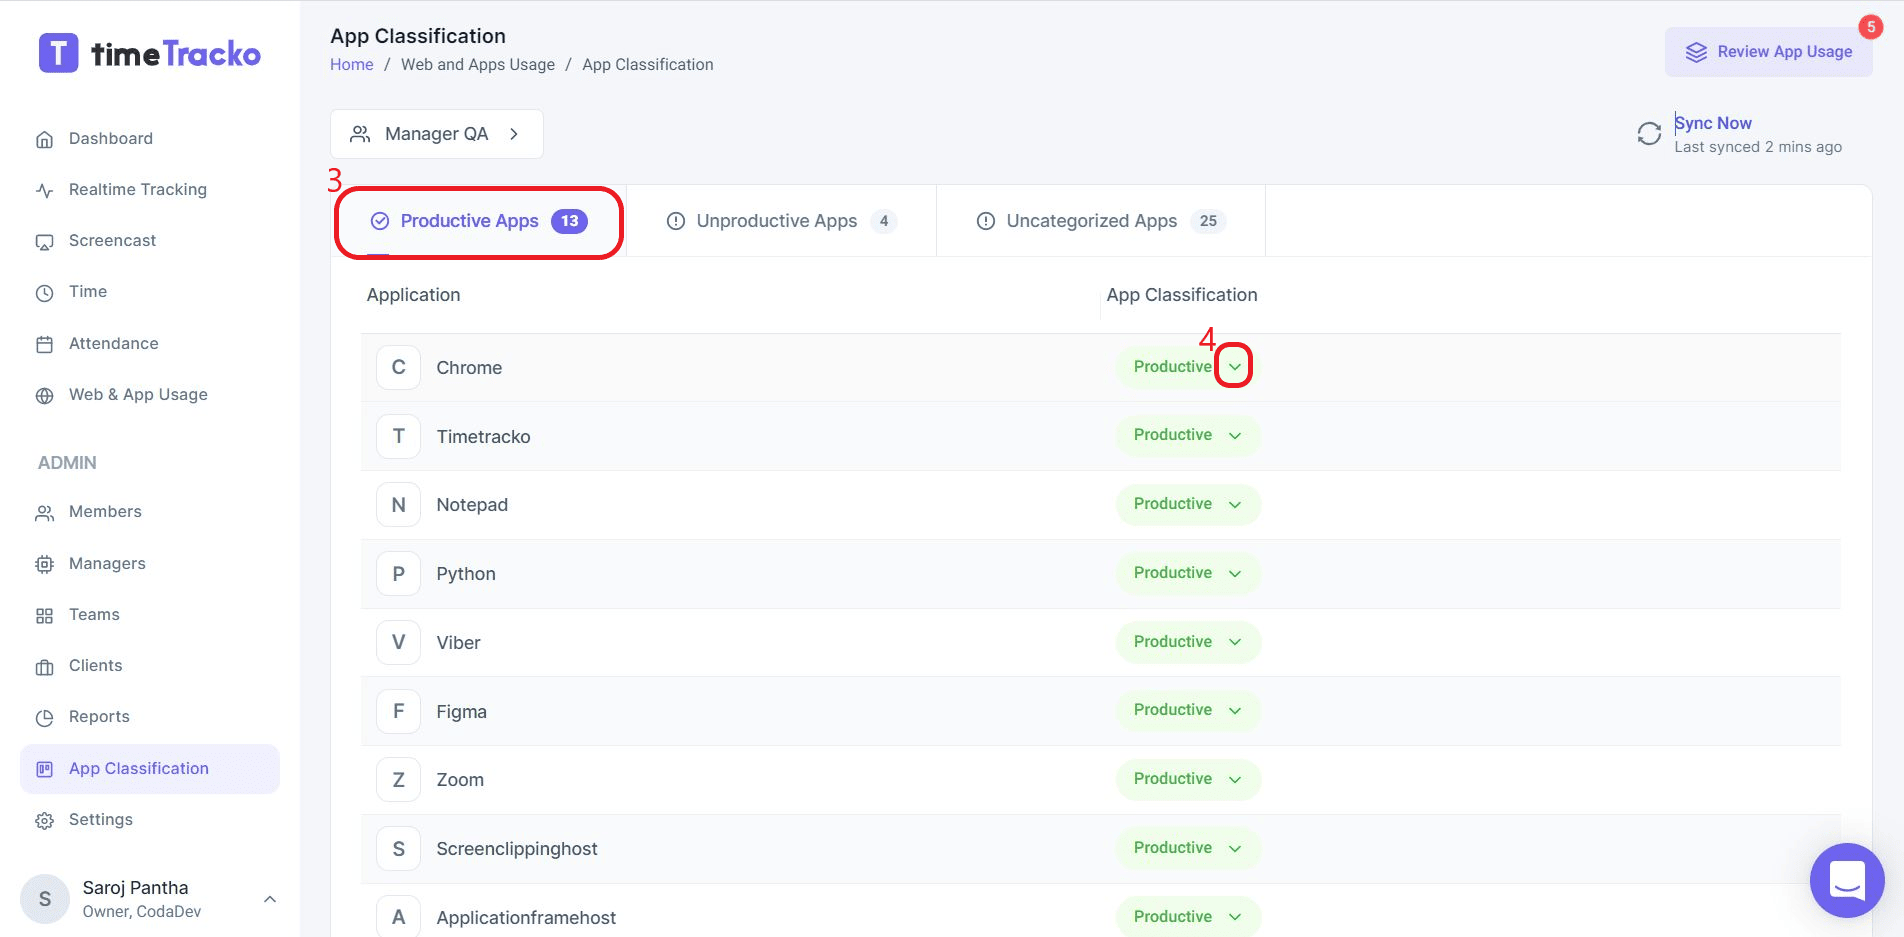
App Classification
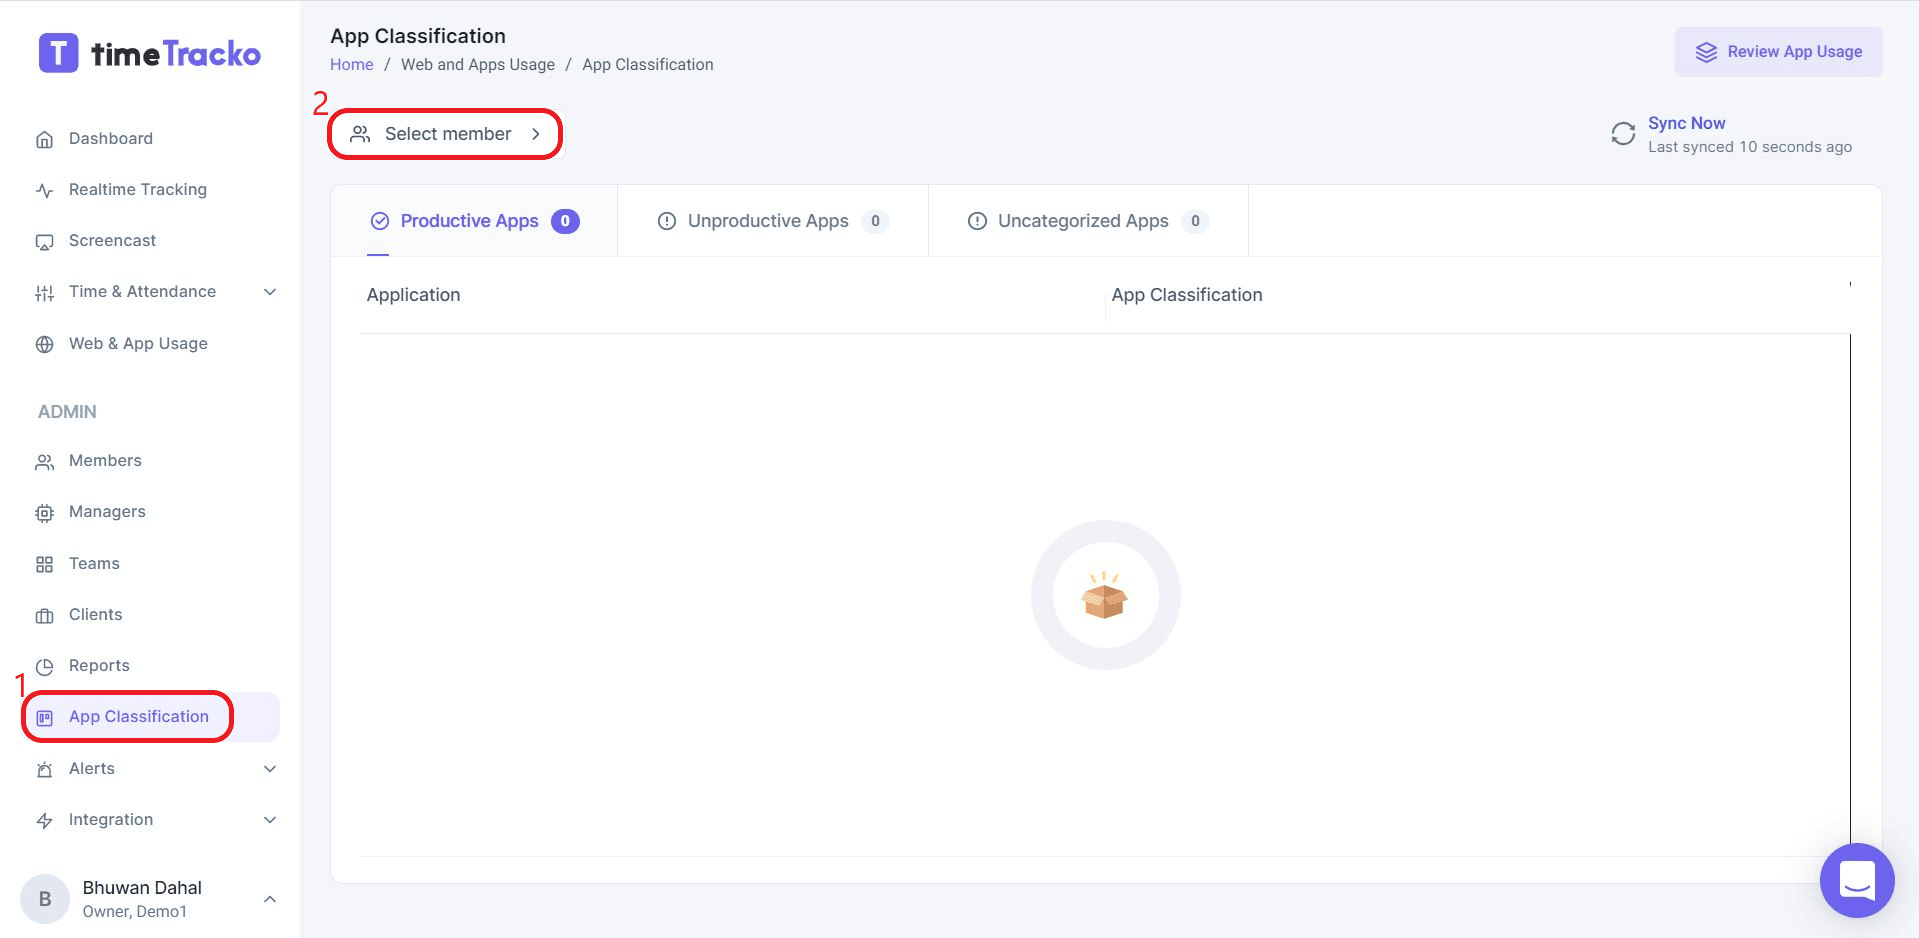
During the work hour, employees use different software, browser, or apps. These apps might be productive or unproductive. Initially, you have to categorize mostly used apps by employees as productive or unproductive.
Once you categorized the app, you can find whether your employees are using a productive app or not. If any employee used the app that you haven’t classified, the app will be recorded in the uncategorized section.
-
To classify the app, tap on App Classification and tap on Select member.
-
After that, you can view the productive and unproductive app used by employees and also categorized the uncategorized app.
Settings
Workspace
-
First, go to Settings and tap on General.
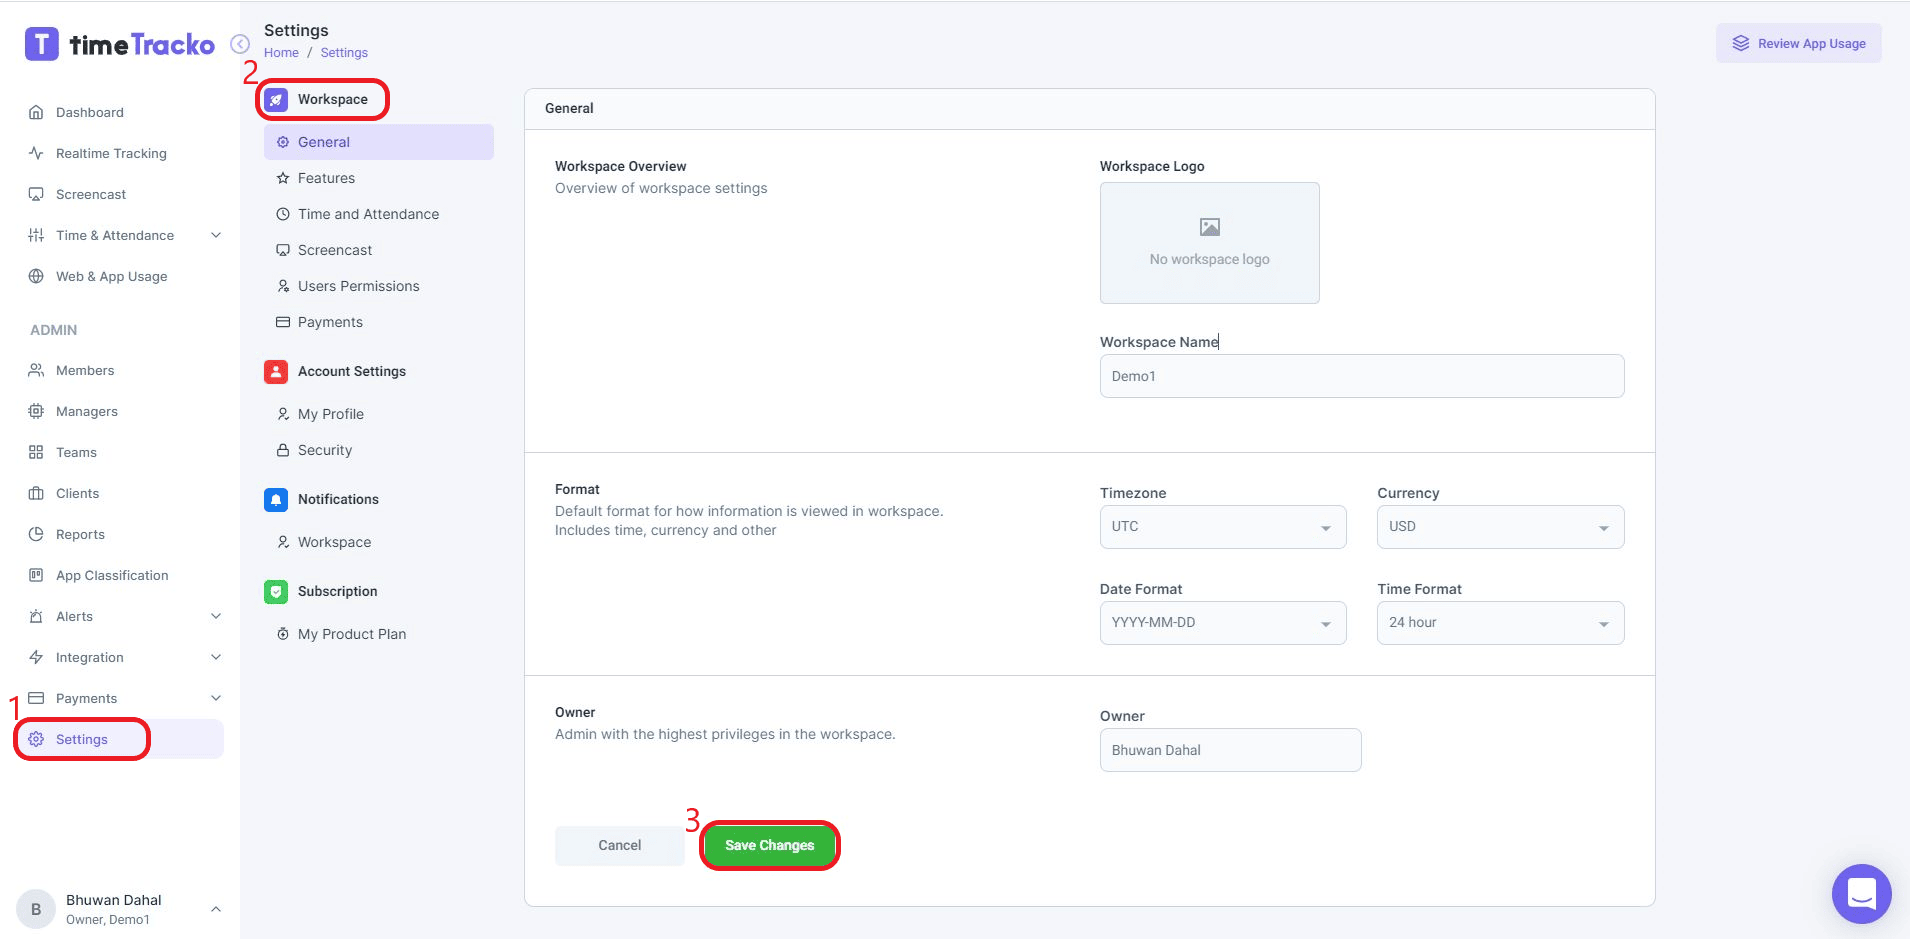
Here you can change Workspace Logo and Time Format. Once you finished the changes, tap on the Save Changes button.
-
To enable/disable the features on the app, go to Settings and then select Features.
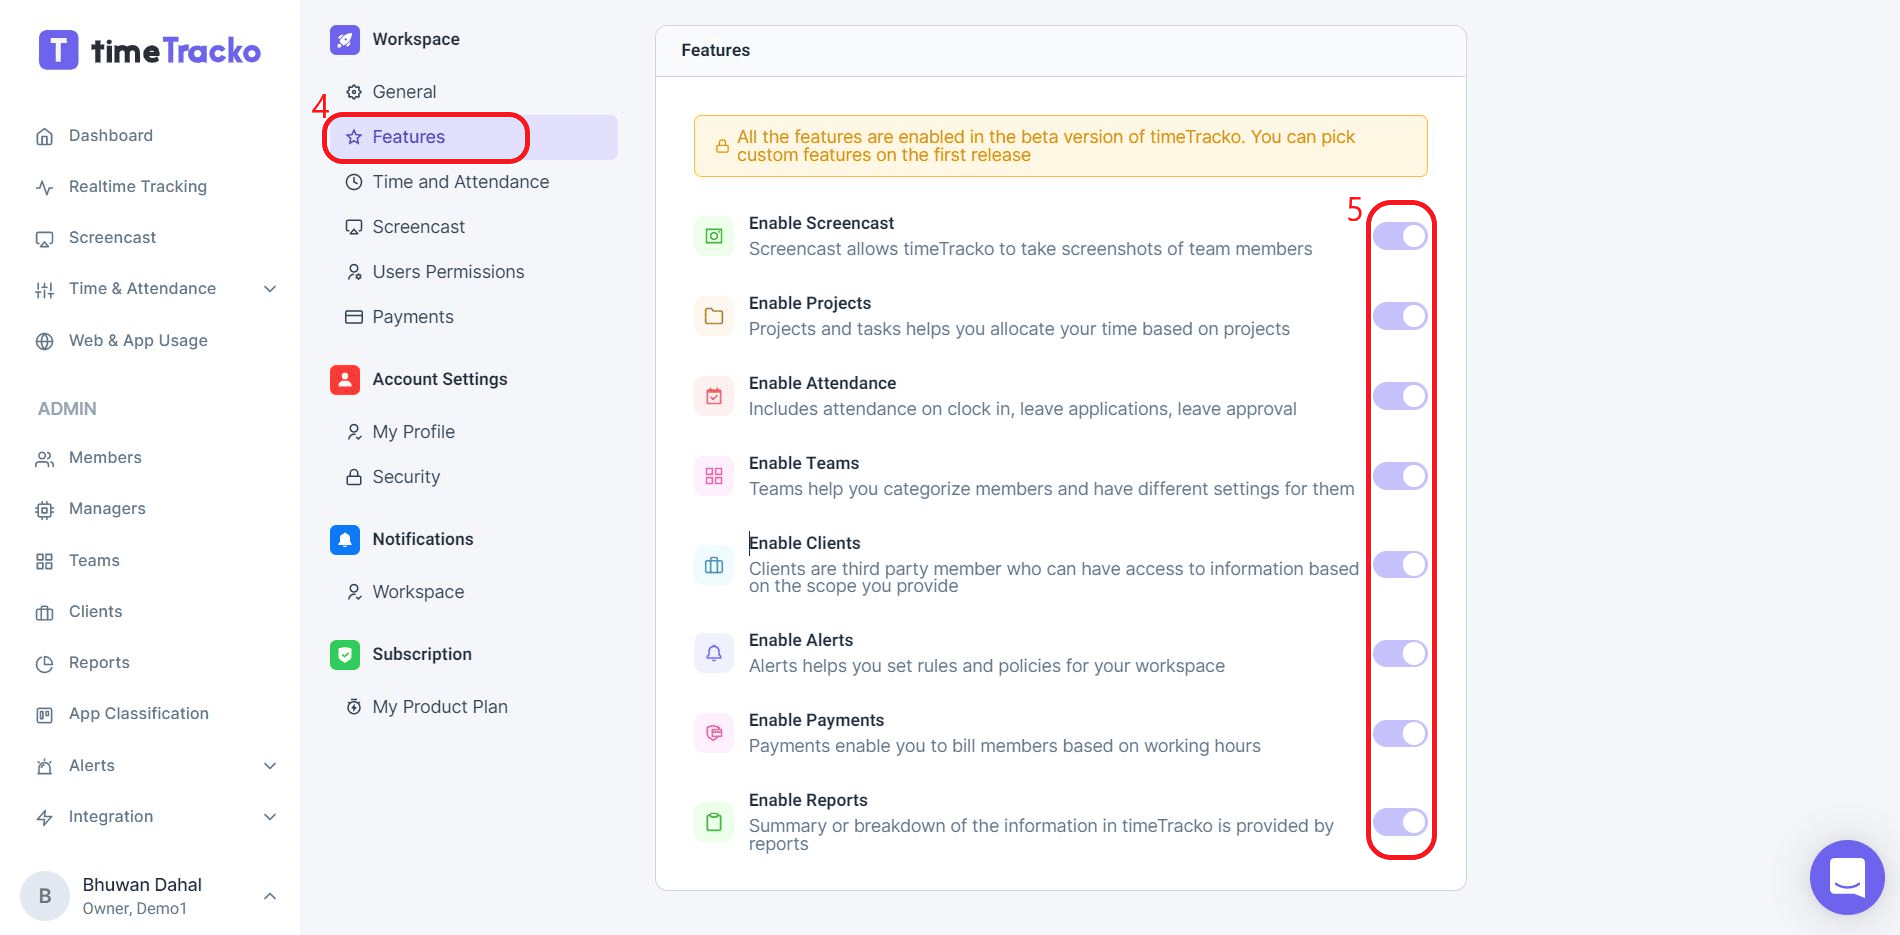
Once you done that, you can enable/disable the features just by sliding the slider situated beside the feature.
-
Similarly, to change the time and attendance setting, go to Settings and then tap on Time and Attendance.
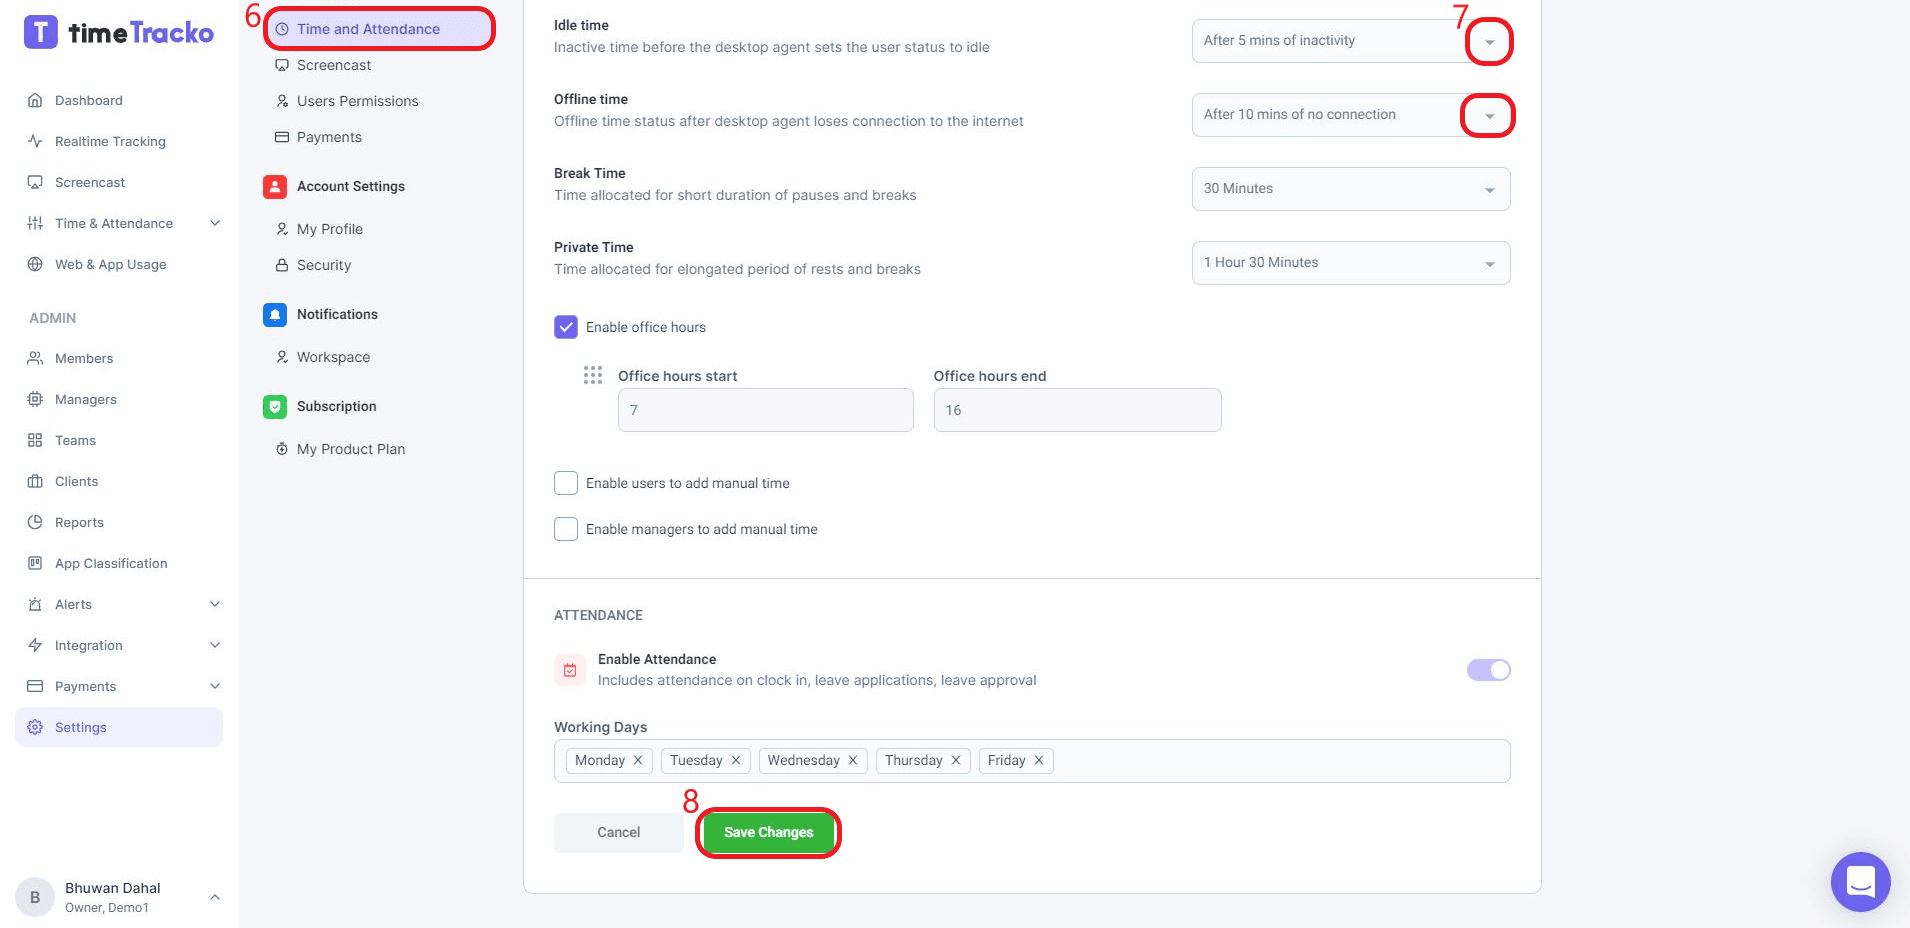
Here you can define the idle time, and office time by selecting options from the button right side. You can also enable/disable the attendance feature just by sliding the sliding bar.
After finishing all the changes, just tap on Save changes.
-
You can also vary the number of screenshots per minute from the Screencast section.
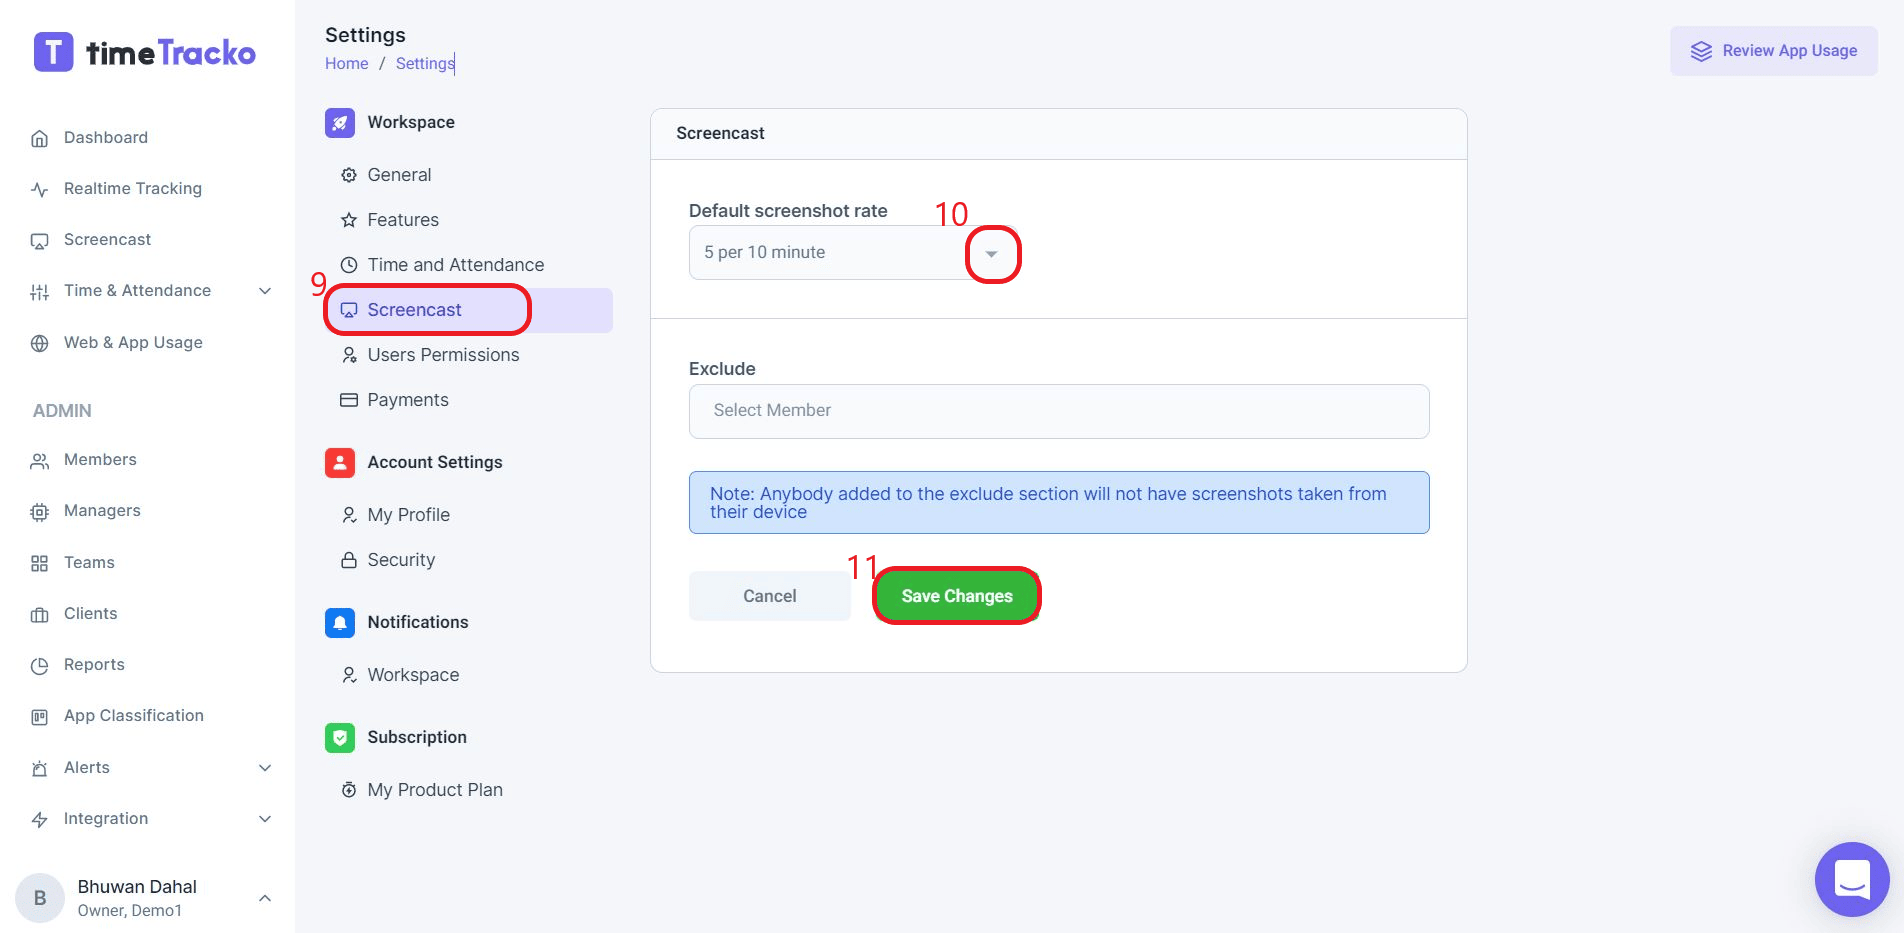
In addition to that, You can also exclude members in the screencast section so that there will be no screenshots taken from their devices.
-
Here in this section, you can give access to different data/reports to members, managers, and clients. To provide access to the data just go to Settings and then select Users Permissions.
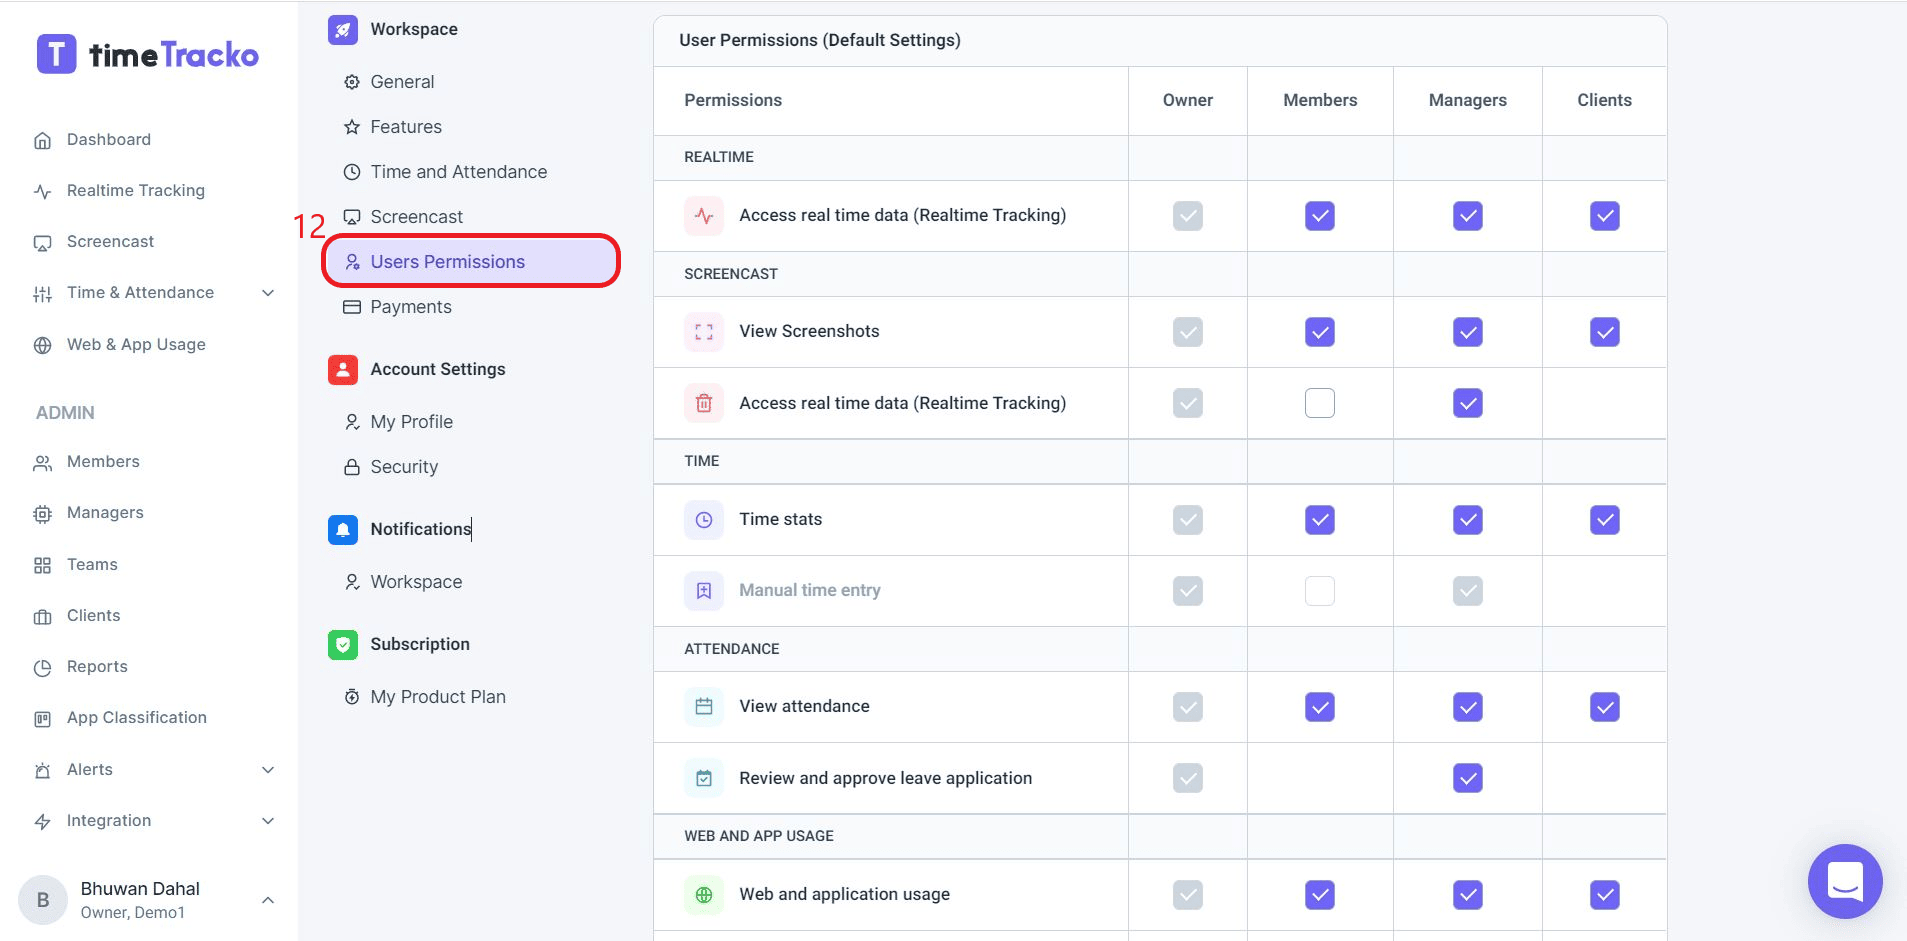
Once that is done, you provide access just by tick marking the features in corresponding members/managers /clients.
Account Settings
In this section, you can change your personal information and passwords.
-
To change the personal information, go to Settings and select My Profile under Account Settings
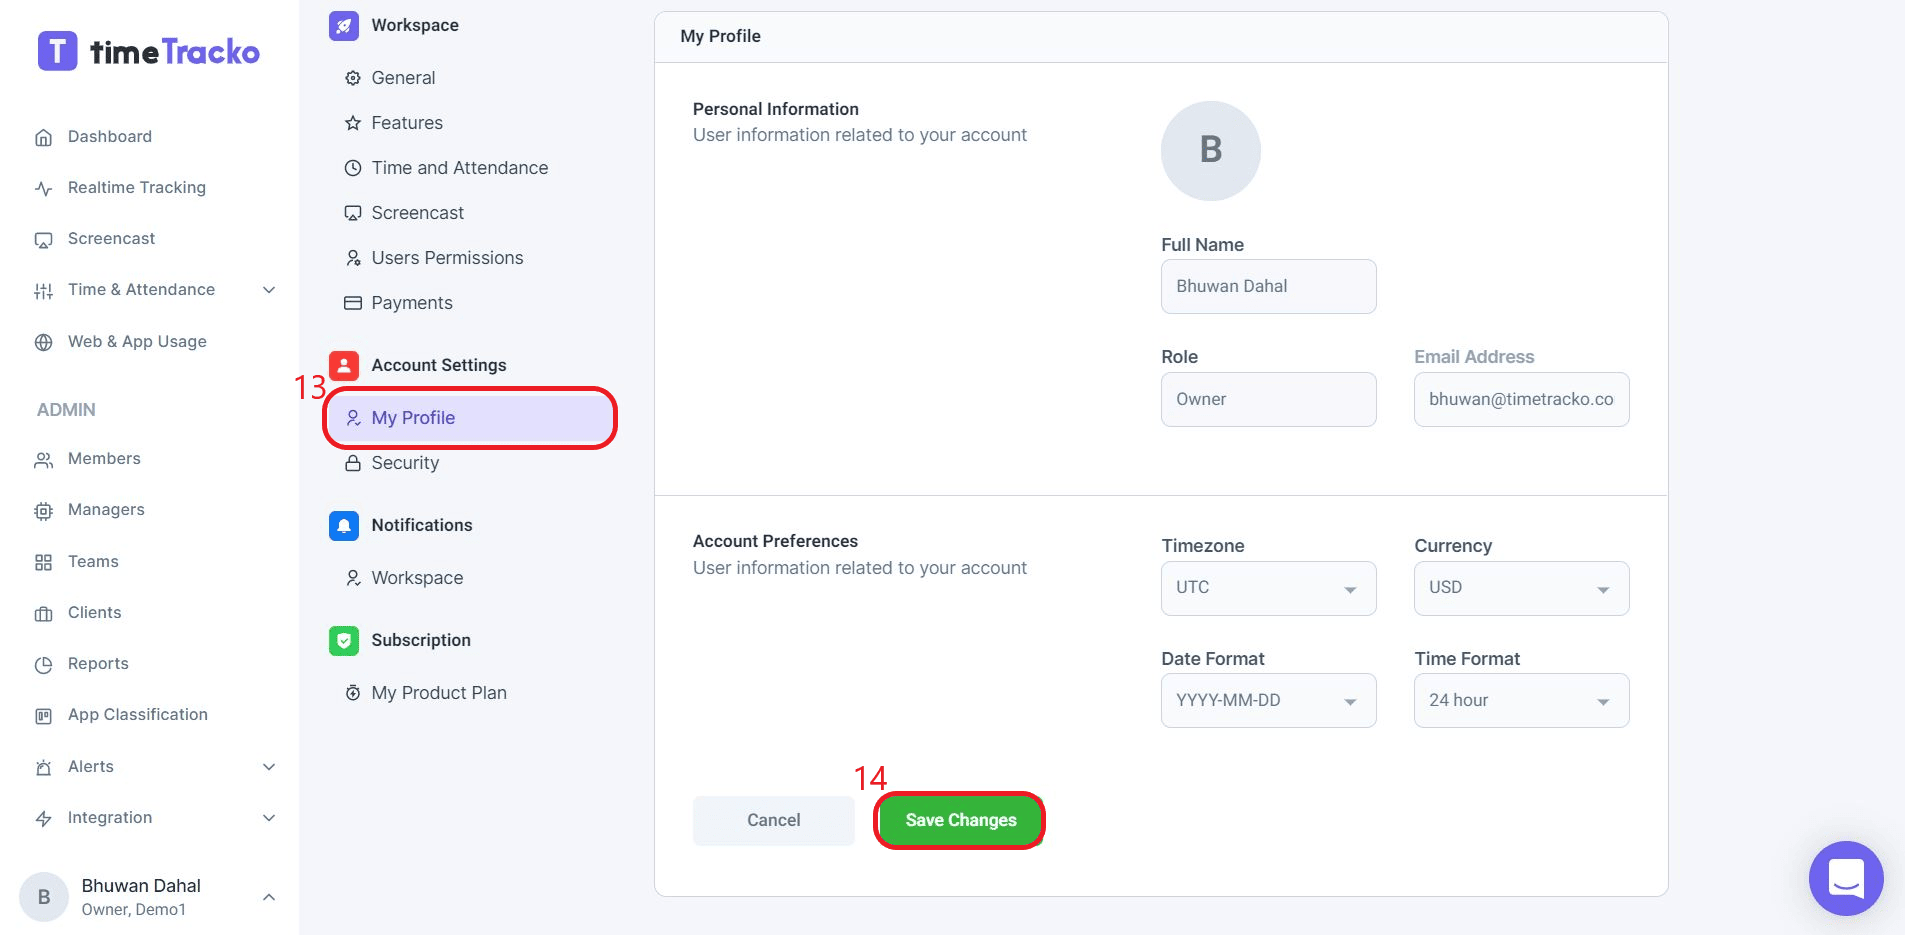
After changing the personal information just tap on Save changes.
-
To change password, go to Settings and select Security under Account Settings. After that enter your old password and then New password. Repeat new password and tap on Save changes.

Notifications
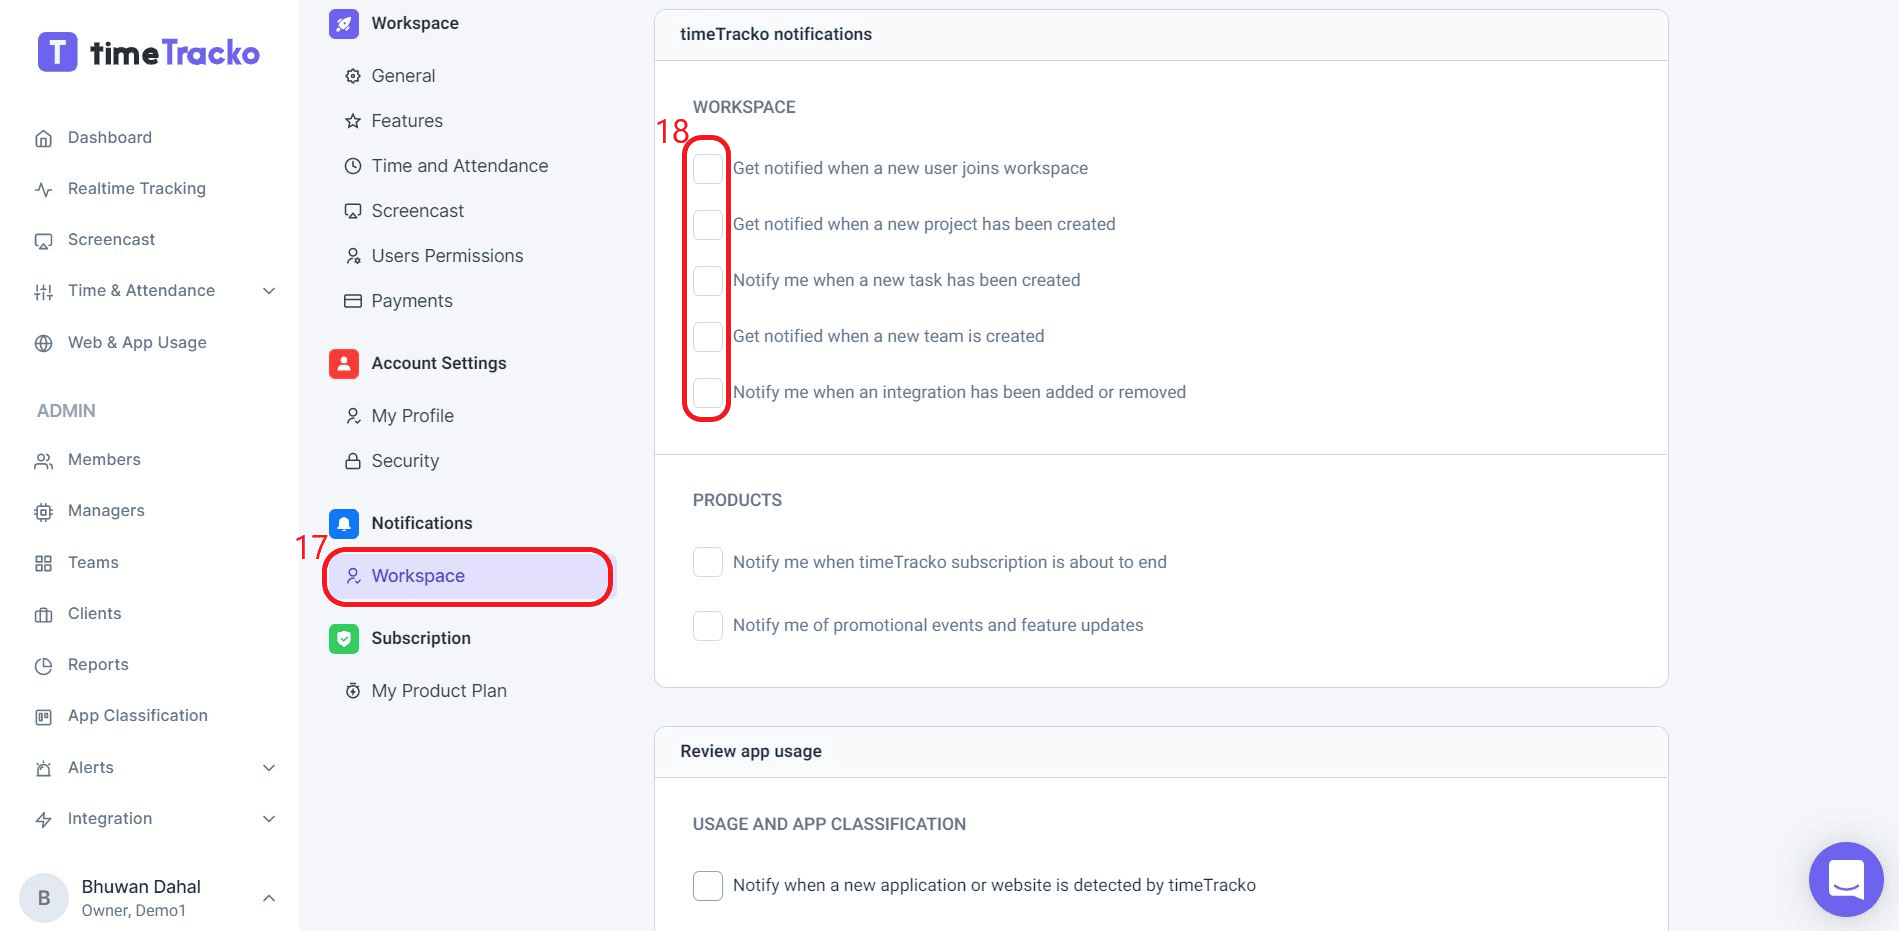
You can also change the notification alert settings and get an only required notification. With timeTracko, you will be notified every time, a new user joined the workspace, team, create a new project, and new app used.
To manage the notification just go to Settings and select Workspace under Notifications. After that checkmark the box, to the corresponding features, you want to be notified.
If you still have any queries, feel free to contact us at support@timetracko.com or head over into 94/7 live chat support.